Sesam Management Studio
Introduction
The Sesam Management Studio is used to configure, manage and administer Sesam subscriptions.
To access the Management Studio, go to the Sesam Portal and click on the desired Sesam subscription.
There is also an experimental version where new features are introduced before they are publicly released in the main portal.
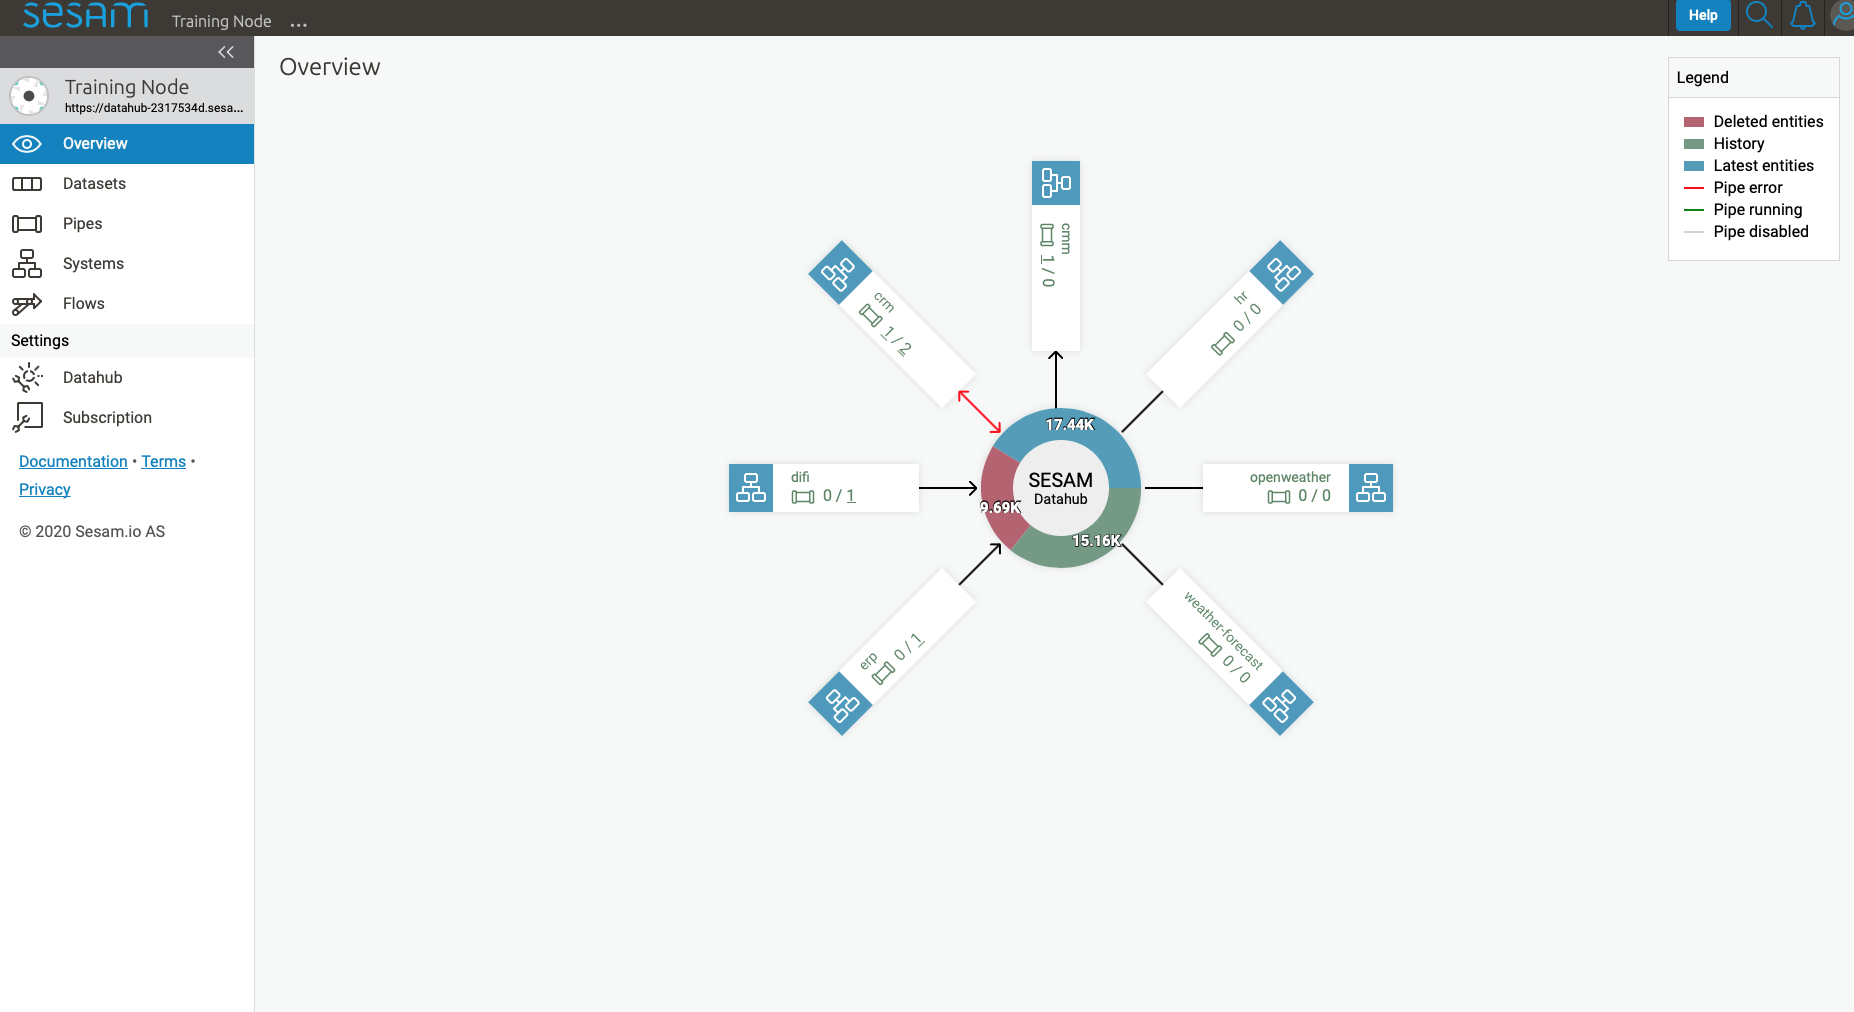
When accessing the Management Studio, the first thing that meets you is the overview page.
Overview
The Overview shows a high-level view of the integrations for the current subscription. It shows all systems, the number of inbound and outbound pipes for each system, and an aggregated count of entities across all global datasets.
Browse
Only available if Integrated Search is enabled for the subscription.
Search
The Search tab allows for free-text search across all global datasets in the current subscription.
The Results will show all the entities that matches the search criteria. Clicking on an entity in the Results will show its details on the right-hand side of the page.
You can drill down further by Ctrl/Cmd+clicking on any namespaced property or namespaced identifier in the selected entity.
Below the Search field you will see three lists that enables more fine tuned filtering of the search result: Datasets, Namespaces, and Properties. The filters are inclusive so selecting multiple filters will include entities from all selected filters.
Filtering on Datasets will limit the result to entities from only the selected datasets.
Filtering on Namespaces will limit the result to entities containing only the selected namespaces.
Filtering on Properties will limit the result to entities containing only the selected properties.
Clicking on an entity identifier link in the Results, takes you to an Identifier tab view for that specific identifier, showing which other entities references this entity, and which other entities this entity references.
Note
Some special characters may give unexpected search results. For instance the character “-” is interpreted by the Elasticsearch engine as a separator, so searching for “foo-bar” will show all entities containing “foo-bar”, but also entities containing only “foo” or only “bar”.
Entity types
The Entity types tab shows all pipes and their inferred Model.
All pipes that have infer_pipe_entity_types enabled (which is the default behaviour, except for developer subscriptions) will contribute to the contents of Entity types.
Note
For Developer and Developer Pro subscriptions, infer_pipe_entity_types must be enabled manually under Datahub > Metadata:
"global_defaults": {
"infer_pipe_entity_types": true
}
.
Then, relevant pipes must be restarted for them to contribute to Entity types.
Clicking on an Entity types takes you to a detailed view of that entity type.
The Name column in the Properties list shows all observed property keys, with namespace prefix where applicable, across all instances of this particular Entity type.
The Type column shows all inferred data types that the particular property is observed to have across all entities that contain the property. The data types are inferred based on observed property values. If the observered values are inferred to multiple data types, each data type is separated by a pipe character (|).
Clicking on a property key takes you to the Property lineage of that property.
Models
Model is inferred from the first part of the pipe id (prior to the first “-“) and from pipes with the metadata "global": true.
Pipes
The Pipes page shows a list of all pipes in the current subscription.
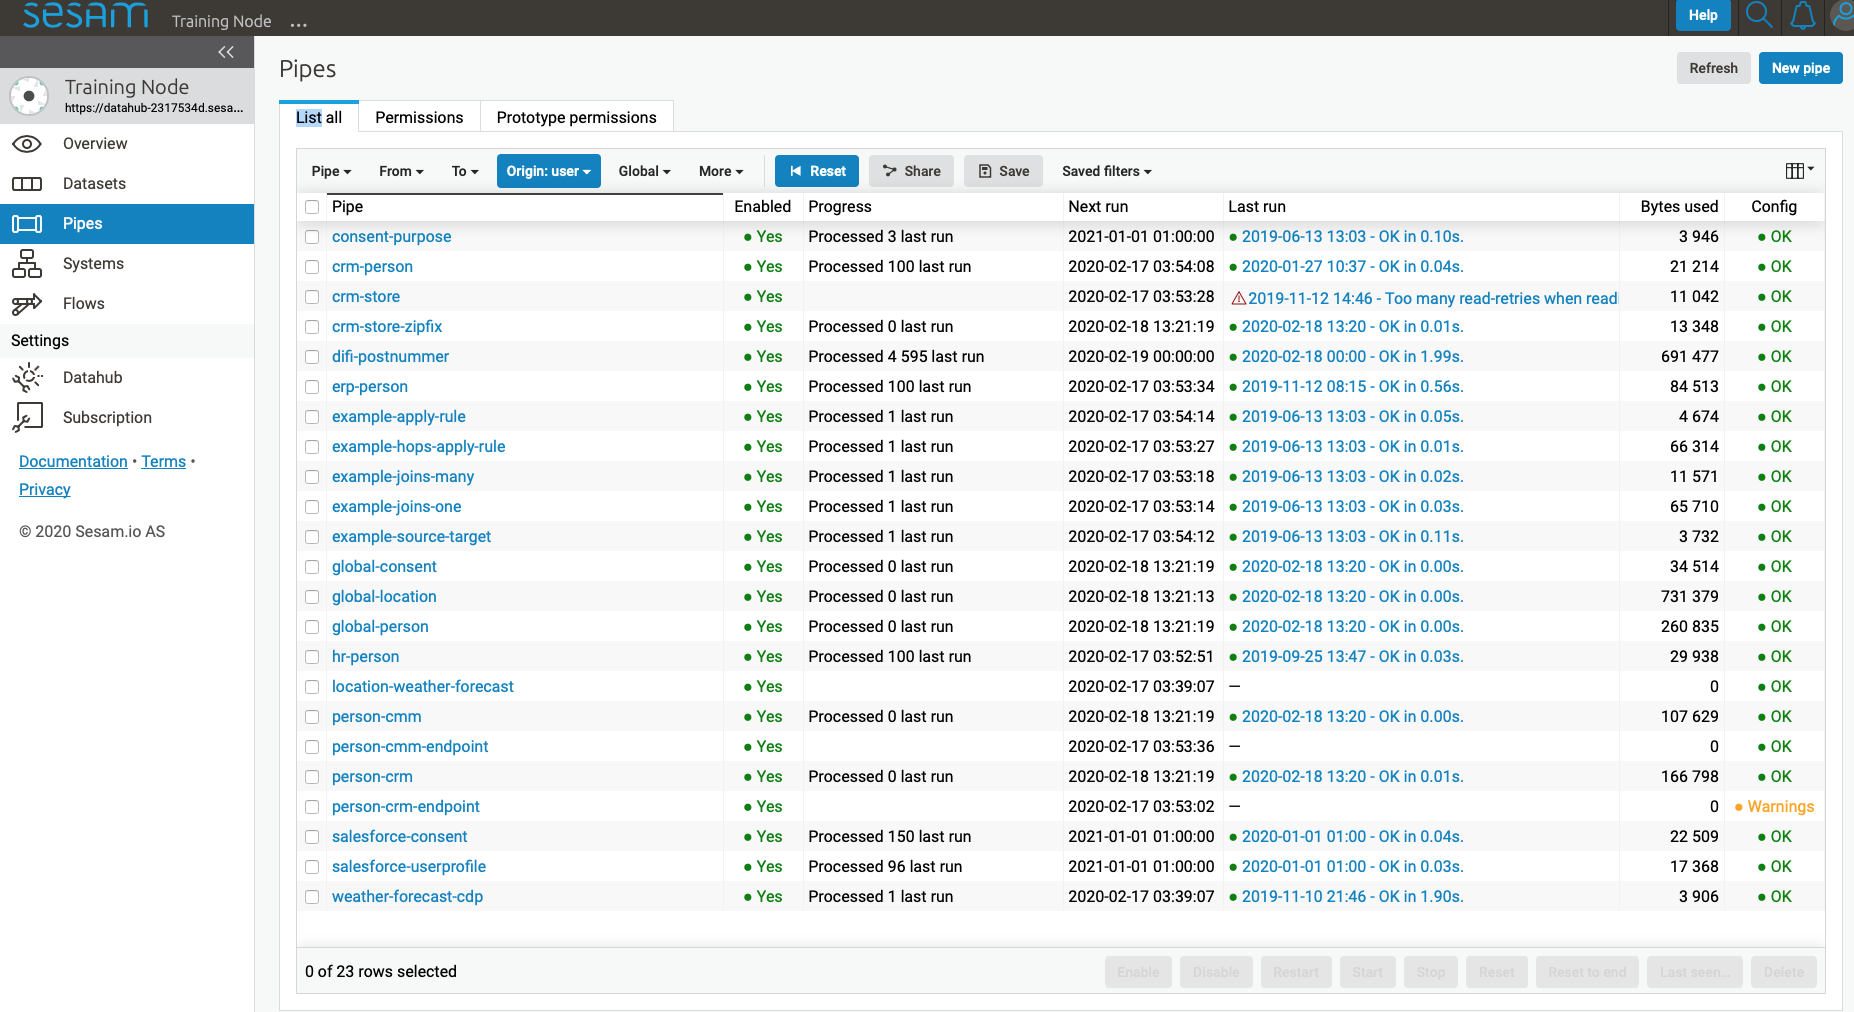
From here you can create new pipes by clicking New pipe in the top right corner of the interface, and view details of existing pipes by clicking on them.
Whether you create a new pipe or click on an existing pipe, you will be taken to the pipe details page. The only difference is that when creating a new pipe, you will be taken directly to the Config tab and most of the other tabs will not be available until the pipe is saved.
New pipe
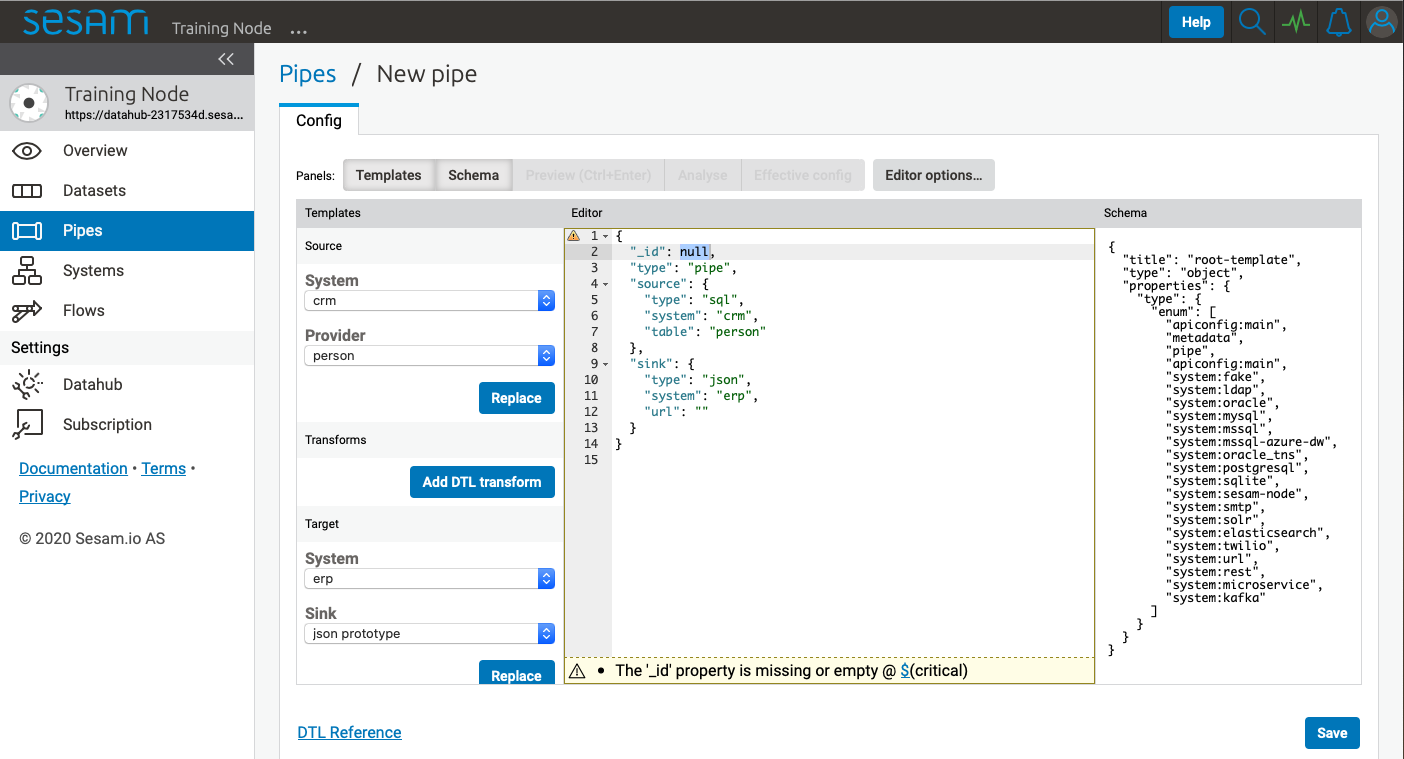
Clicking New pipe takes you to the config tab of a new pipe with the Templates panel activated.
First supply a unique value for _id or the pipe cannot be saved.
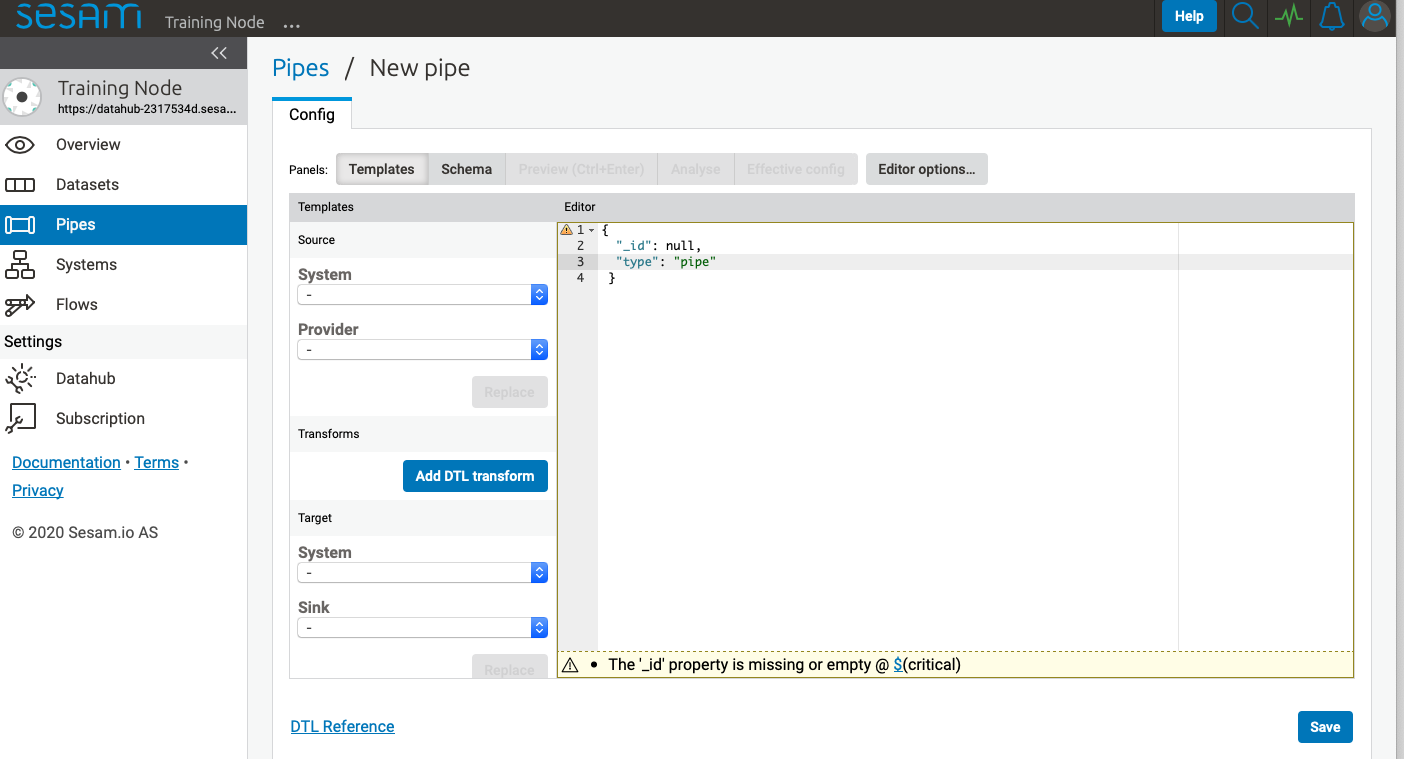
Source template
The Source template gives easy access to the available systems that this pipe can read data from. By selecting a system from the System dropdown menu, the Provider dropdown menu will be populated with specific options for the selected system.
Let us select the crm system and the person provider.
After selecting relevant System and Provider, click Replace to add the selections to the pipe config.

Transforms template
Next click Add DTL transform to add a DTL transform template to the pipe config. This is a great starting point for writing your own DTL.

Please visit Data Transformation Language for more information about DTL.
Now click Save, and then Start.
To see the pipe run progress and to make sure the pipe is finished, click Refresh.
To see the result, click the Output tab.
Target template
By default all pipes write data to a dataset sink, and the dataset will be given the same id as the pipe _id.
You can override this default behaviour by adding a sink config. Adding a sink config can be done with the Target template.
Similar to the Source template, select the desired target system from the System dropdown menu and the Sink dropdown menu will be populated with specific options for the selected system.
As an example, if we wanted to push data to the erp system we could select the erp system and the json sink.
After selecting a relevant sink, click Replace to add the selections to your pipe config.
Please visit Sinks for more information about sinks.
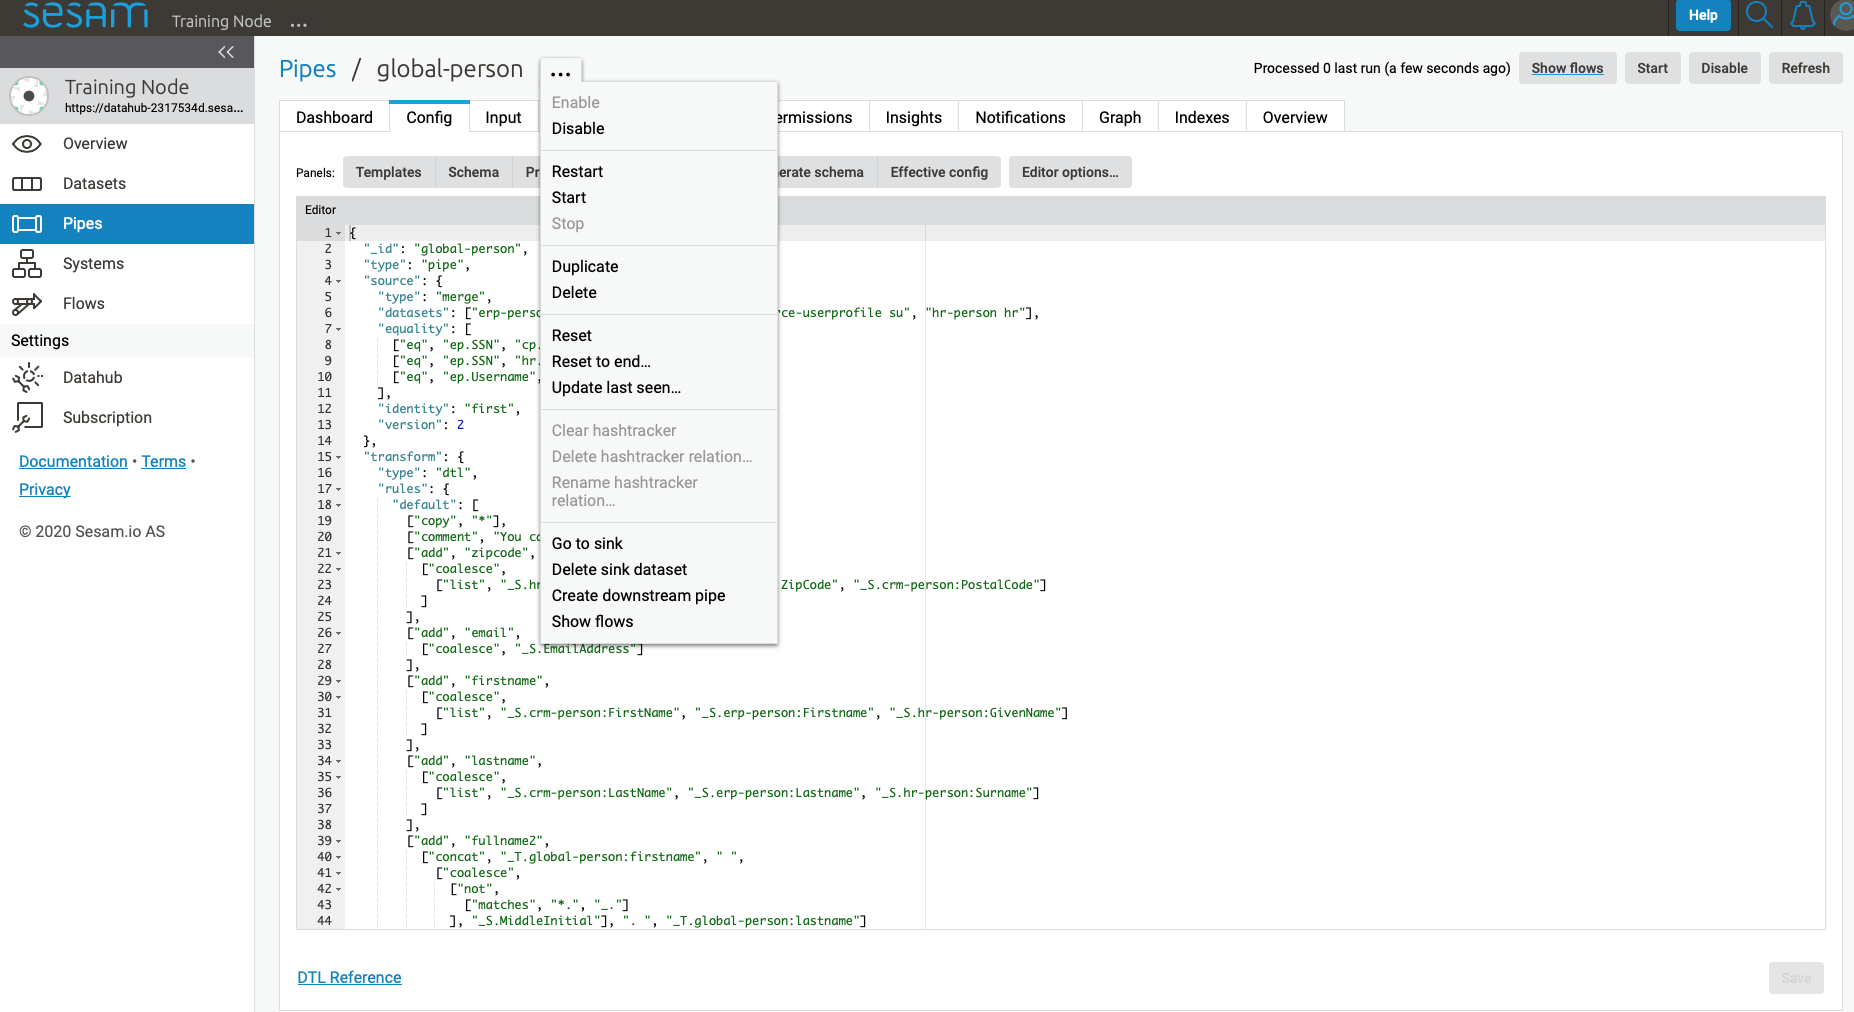
Pipe details
Clicking a pipe on the Pipes page takes you to the details of that pipe.
Clicking the “…” menu to the right of the pipe name will bring up various options for the pipe, explained below.
Dashboard tab
Config tab
Templates panel
Schema panel
Clicking the Schema panel shows the pipe schema on the right-hand side of the interface. The pipe schema defines valid structure for the pipe config.
Preview (Ctrl+Enter) panel
Clicking the Preview panel shows a preview of how an entity will look after passing through the pipe.
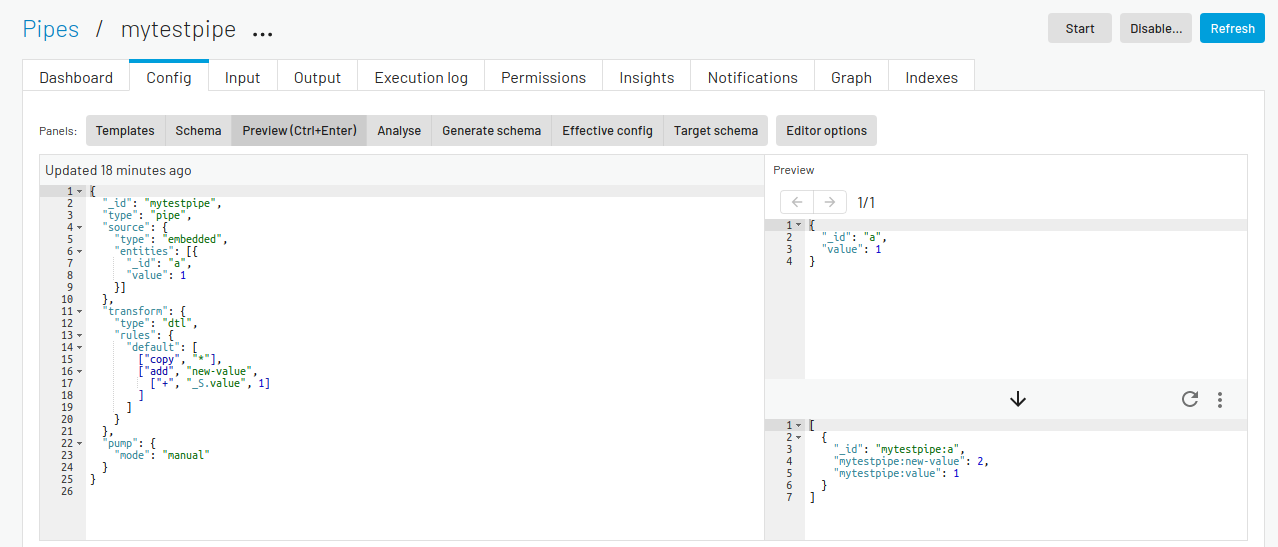
The top right panel shows the source entity that is being used in the preview. The inital value for this entity is picked from the pipe’s source if the source-type allows it, otherwise a small sample entity is generated. You can manually modify the source-entity and press Ctrl+Enter to preview the resulting output-entity.
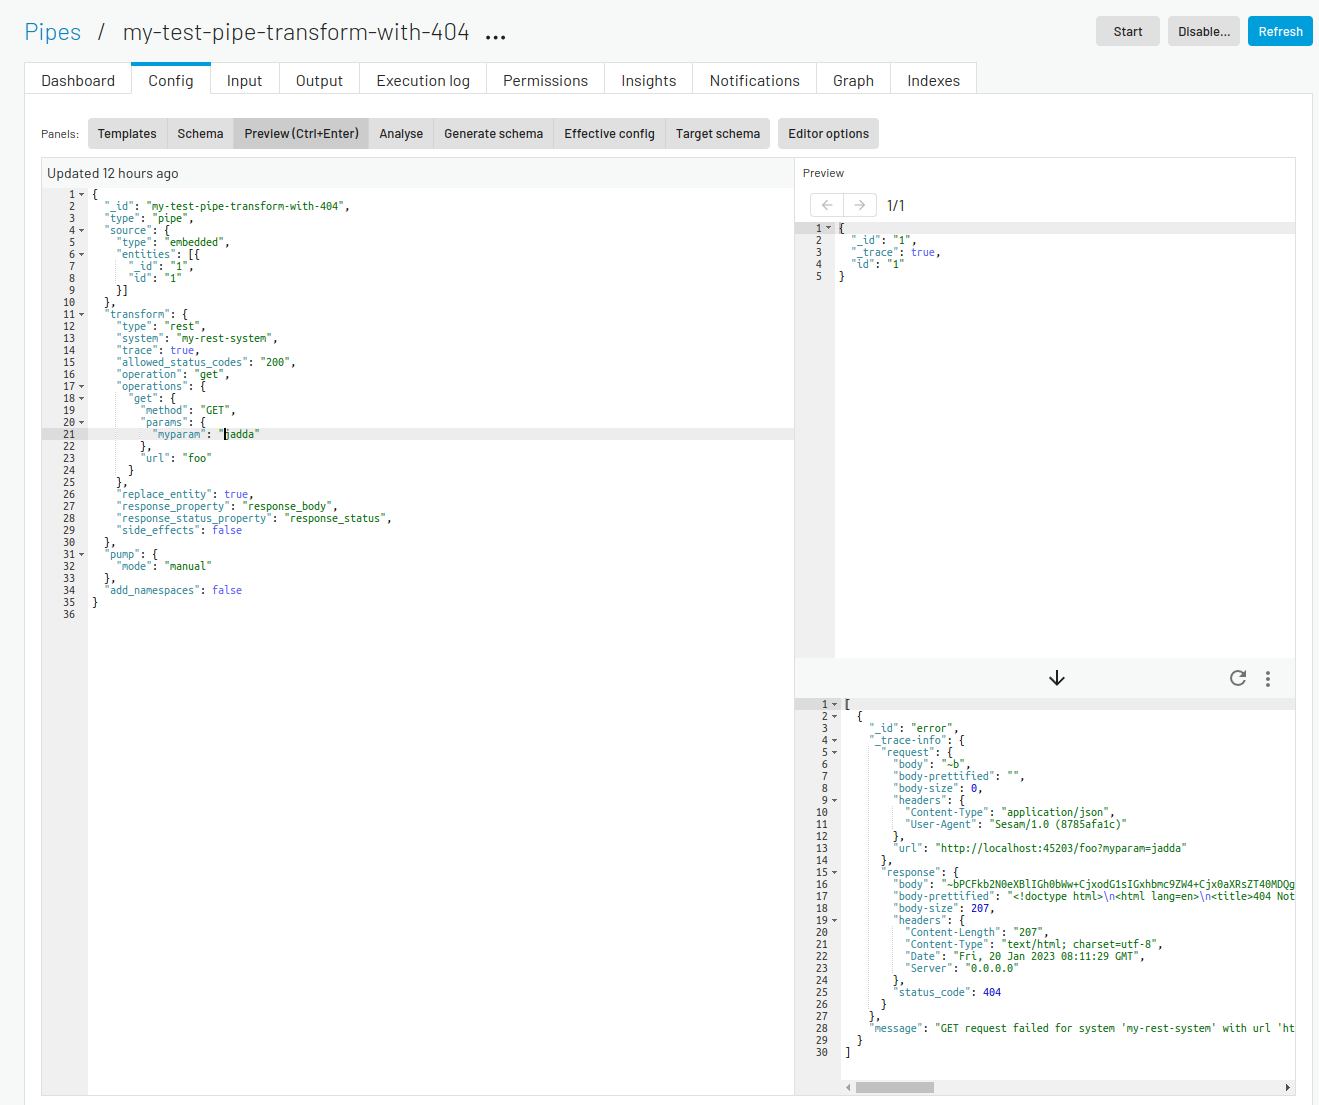
If your pipe has a REST transform or a REST sink you can get trace
information about which http requests and responses the REST components sends and receives. This is enabled by
adding a "_trace": true property to the source entity and pressing Ctrl+Enter. The example below shows how this
can look for a pipe with a rest-transform that gets a 404 “Not Found” response from the service it tries to talk to.
Analyse panel
Generate schema panel
Effective config panel
Target schema panel
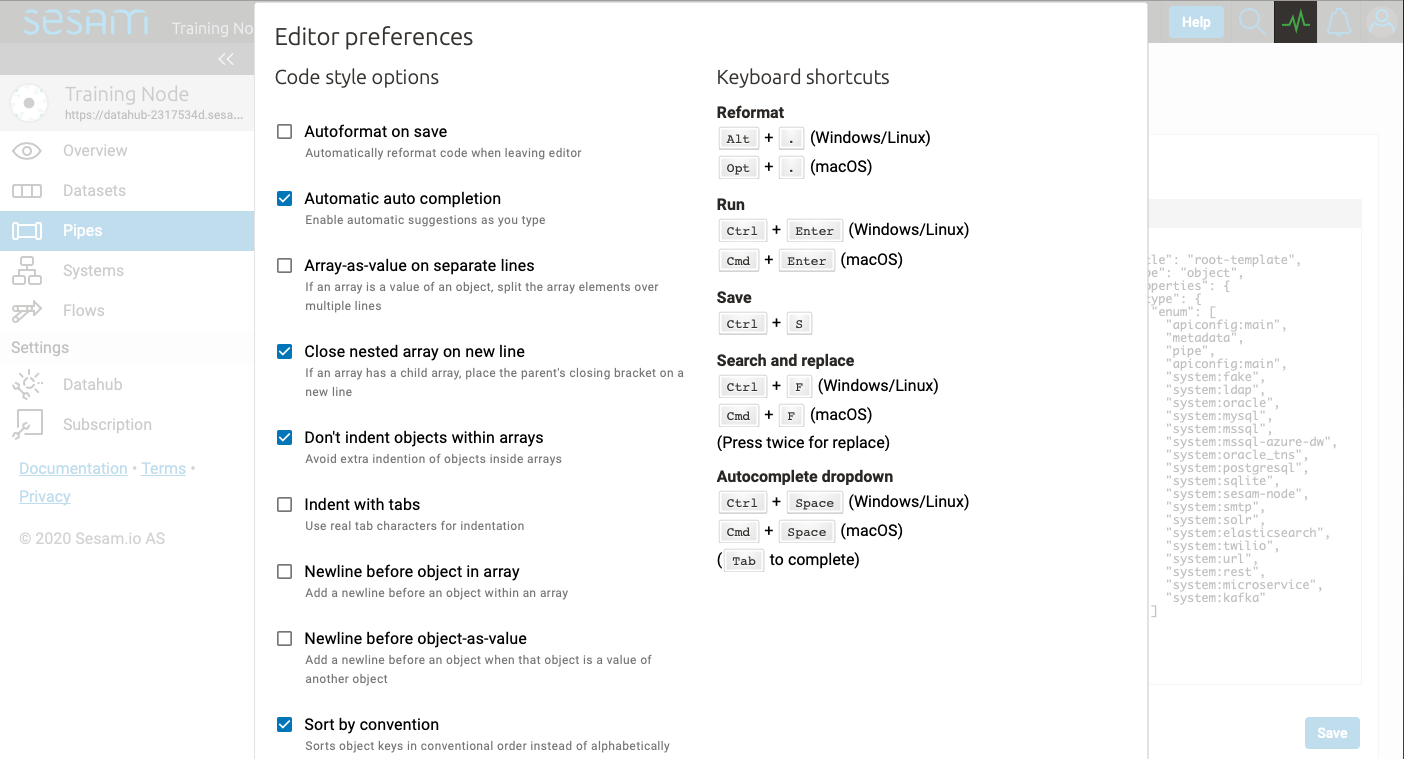
Editor options
The Editor options… allows you to customize various coding styles and shows a list of keyboard shortcuts.
Feel free to experiment with these options to find what fits your preferences.
Input tab
Shows information about the pipe’s source.
Output tab
Shows information about the pipe’s target.
Inferred schema tab
Execution log tab
Permissions tab
Insights tab
Notifications tab
Graph tab
Indexes tab
Systems
The Systems page shows a list of all systems in the current subscription.
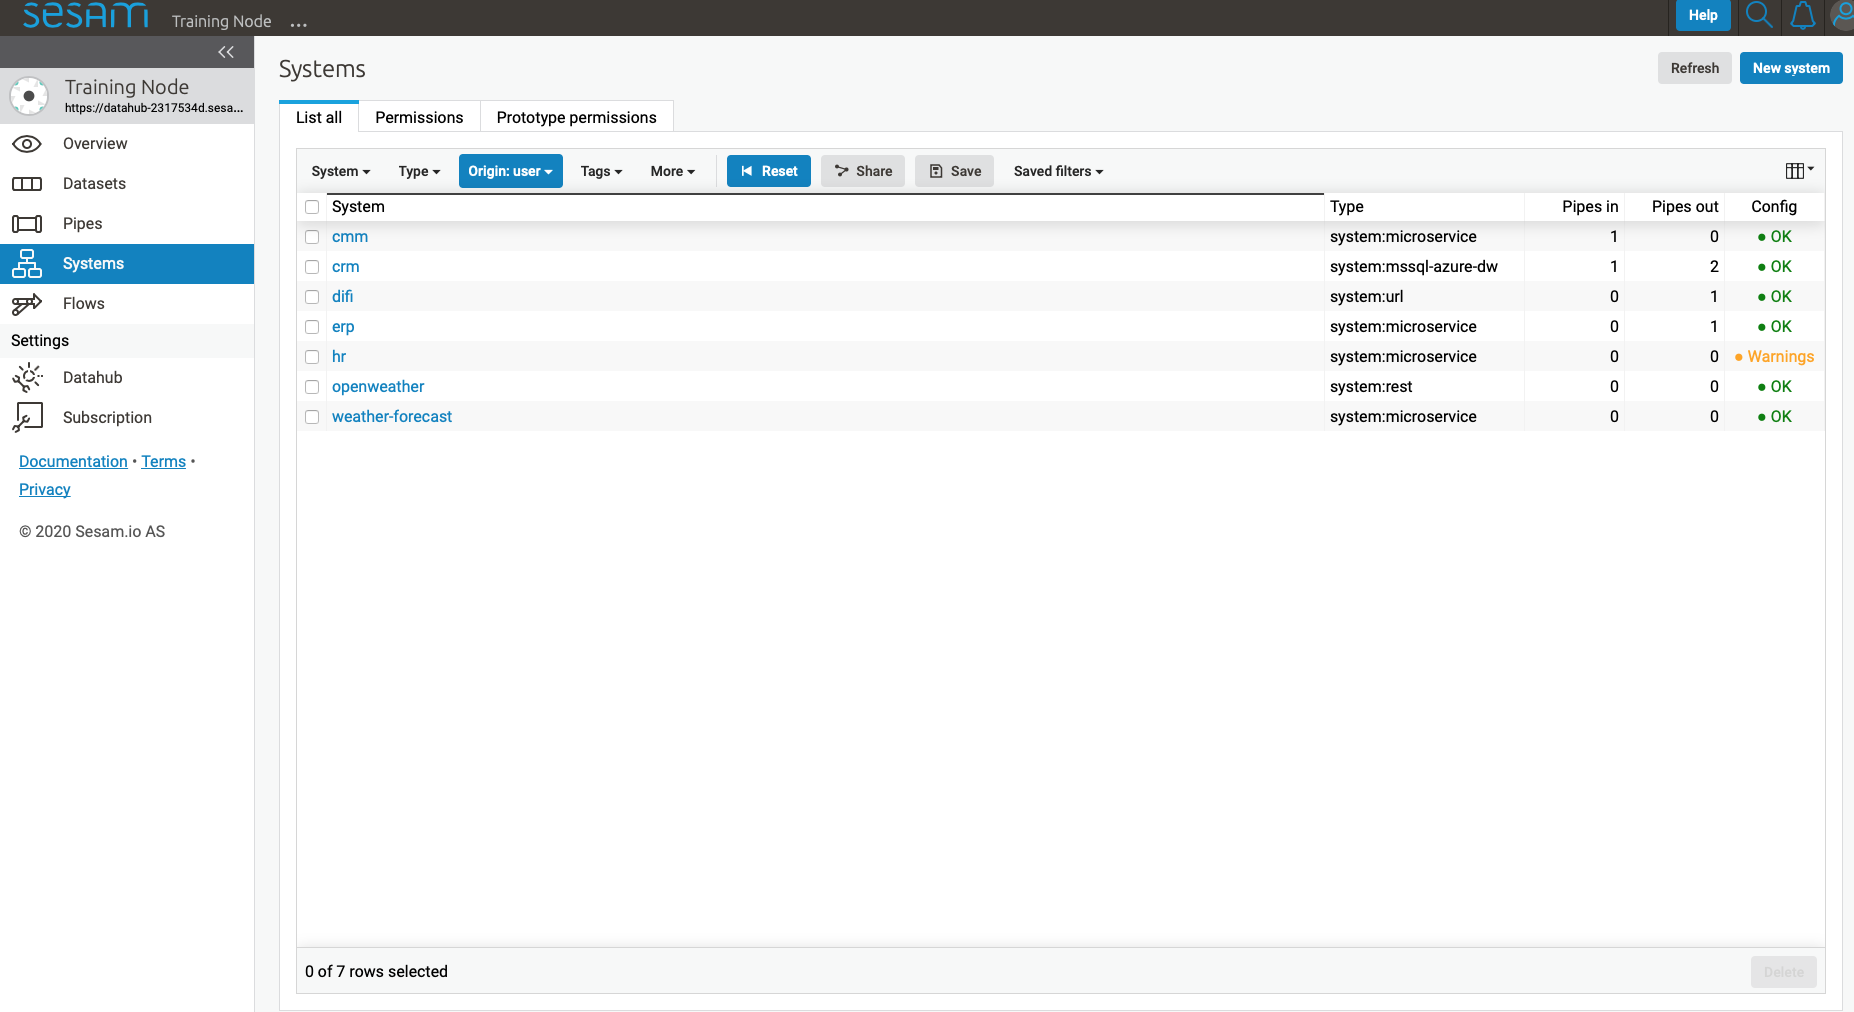
Clicking on a system takes you to the details of that system.
You find seven tabs where you can manage permissions and secrets in addition to see status, see which pipes go in and out of system in graph tab and lastly get an overview.
As with pipes you can click “…” next to the system name and from this menu you can duplicate the current config or delete it.
Dashboard tab
Config tab
Secrets tab
Permissions tab
Status tab
Graph tab
Overview tab
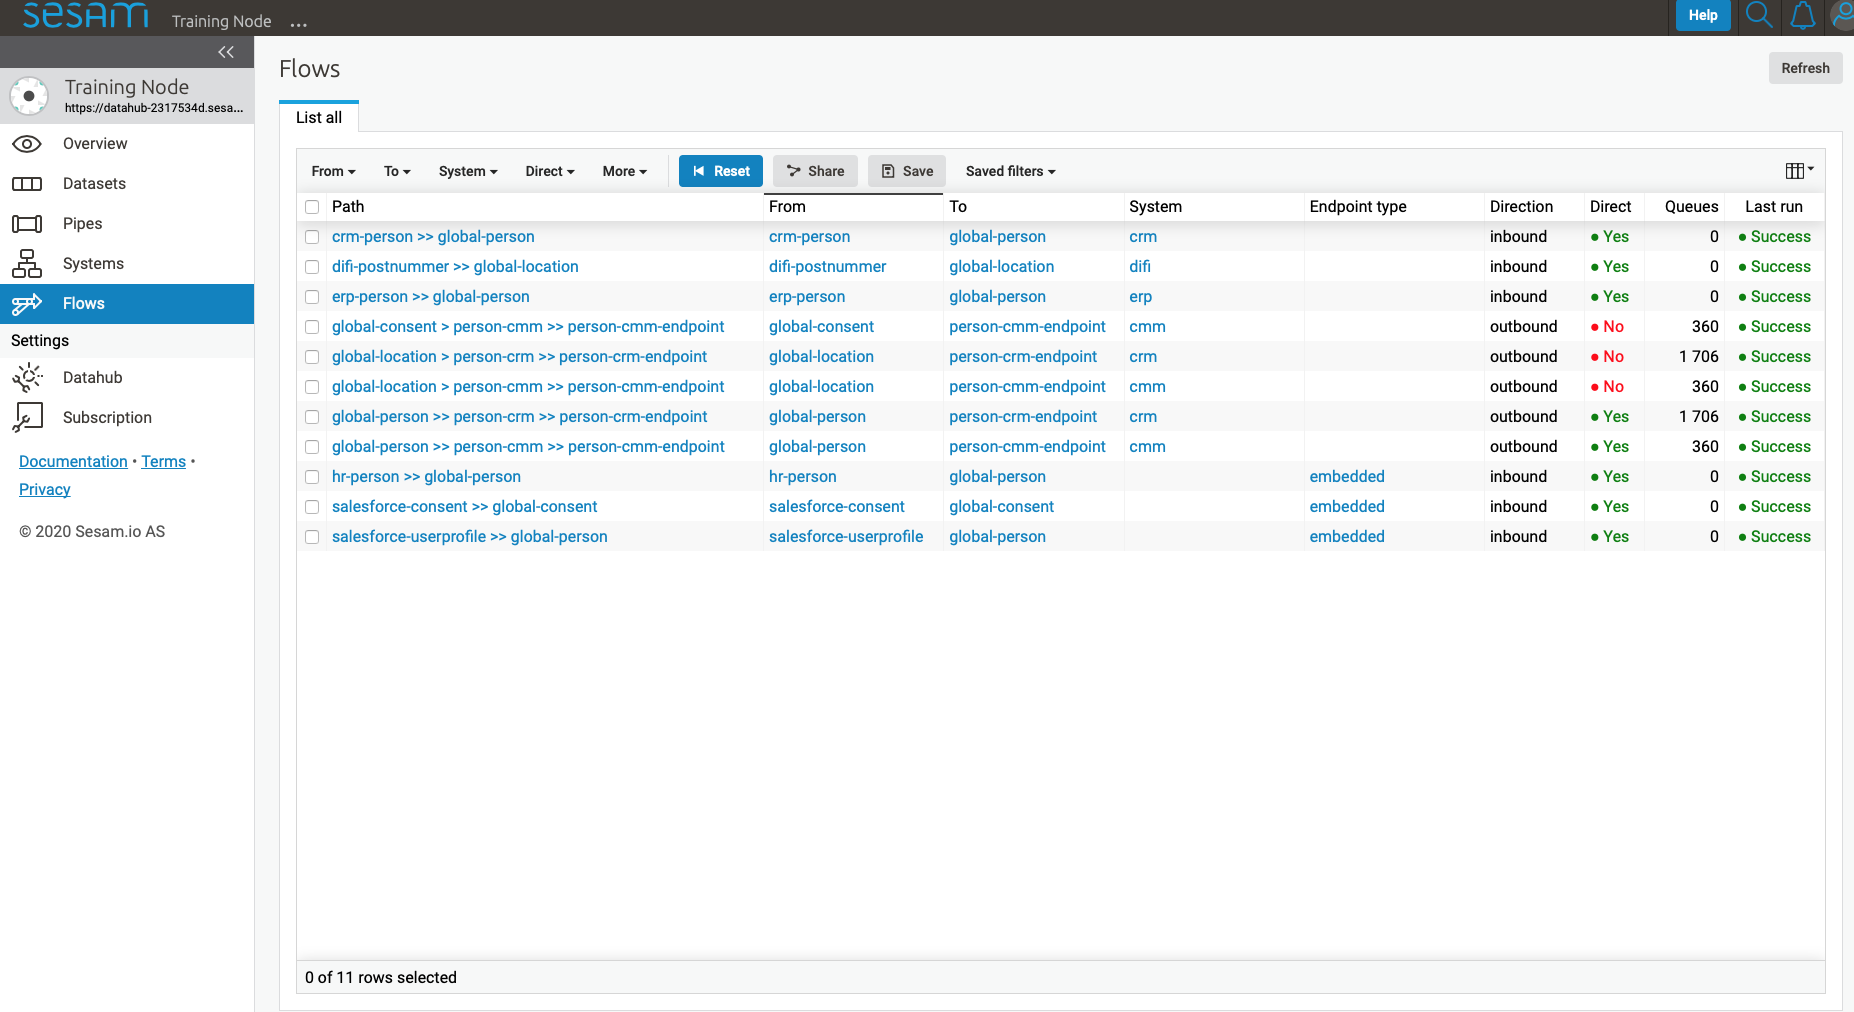
Flows
In Sesam, a flow can be defined as a collection of pipes on one path, either from a global to an endpoint or vice versa.
On the Flows page you can get information about a flow as a whole, whether any pipe is disabled/errored out, as well as you get a total number of queues in a flow, for example.
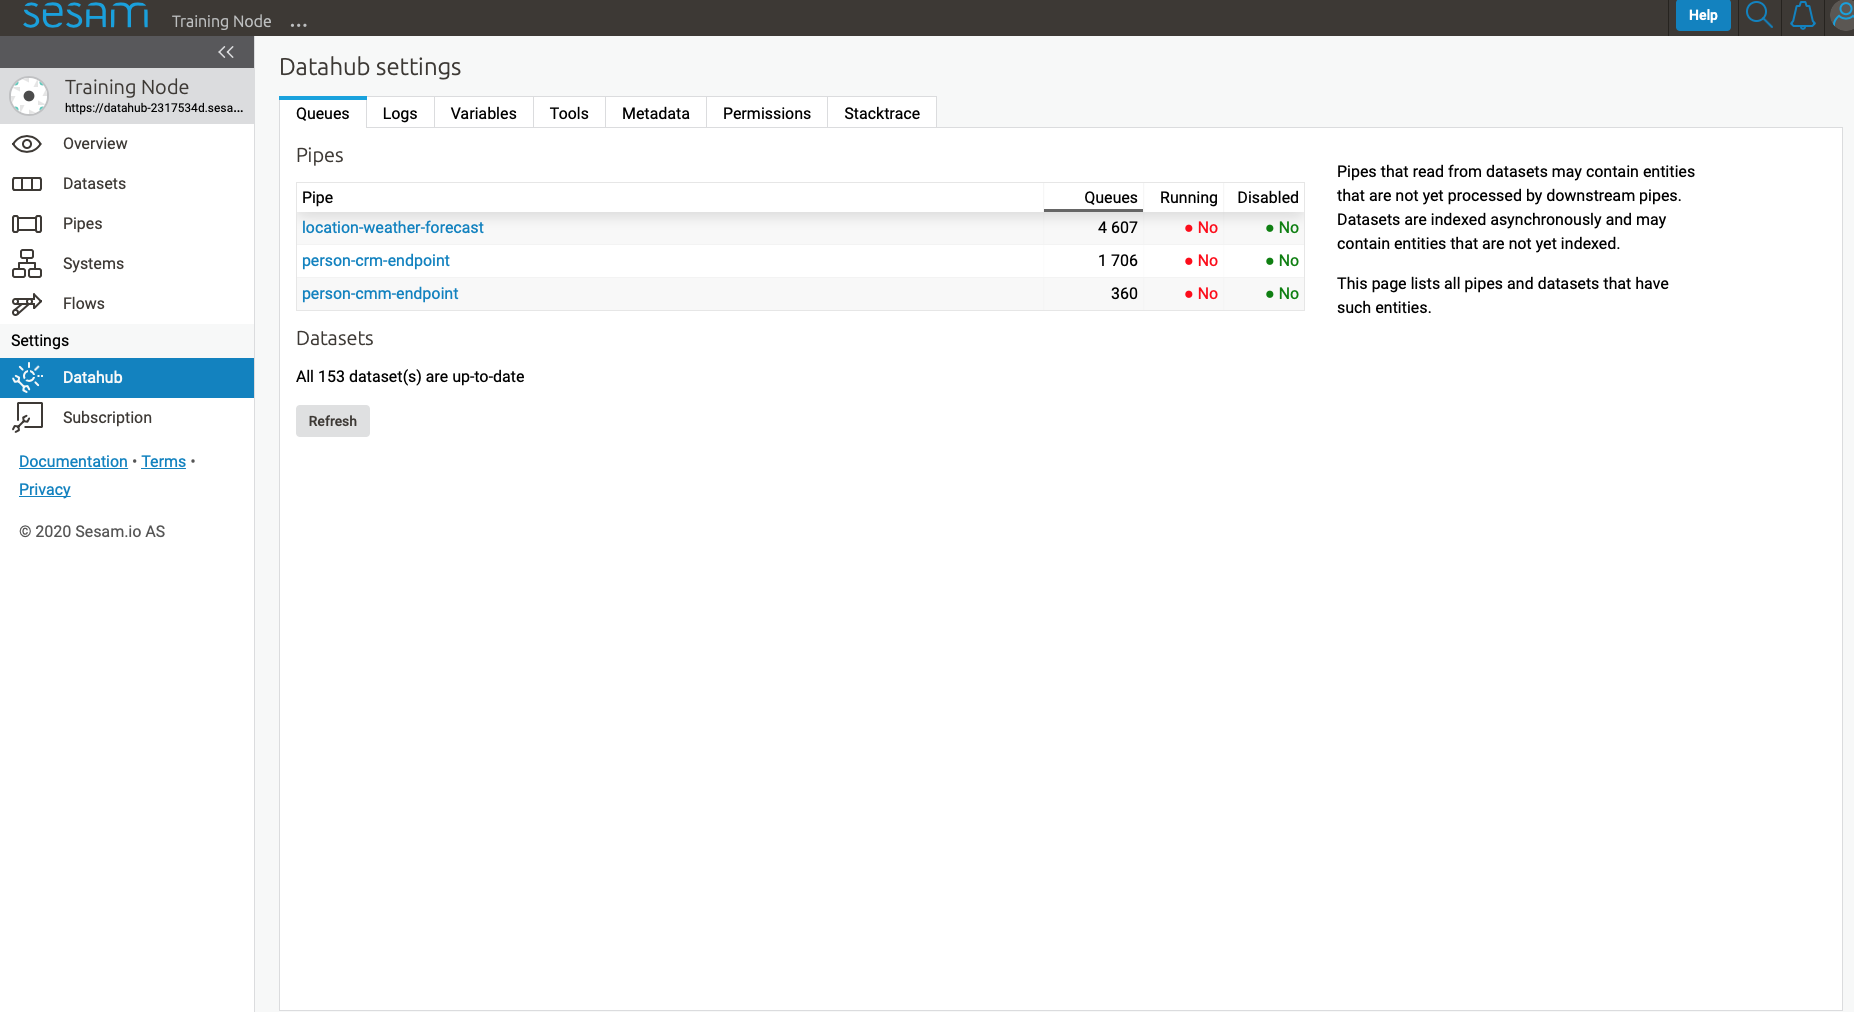
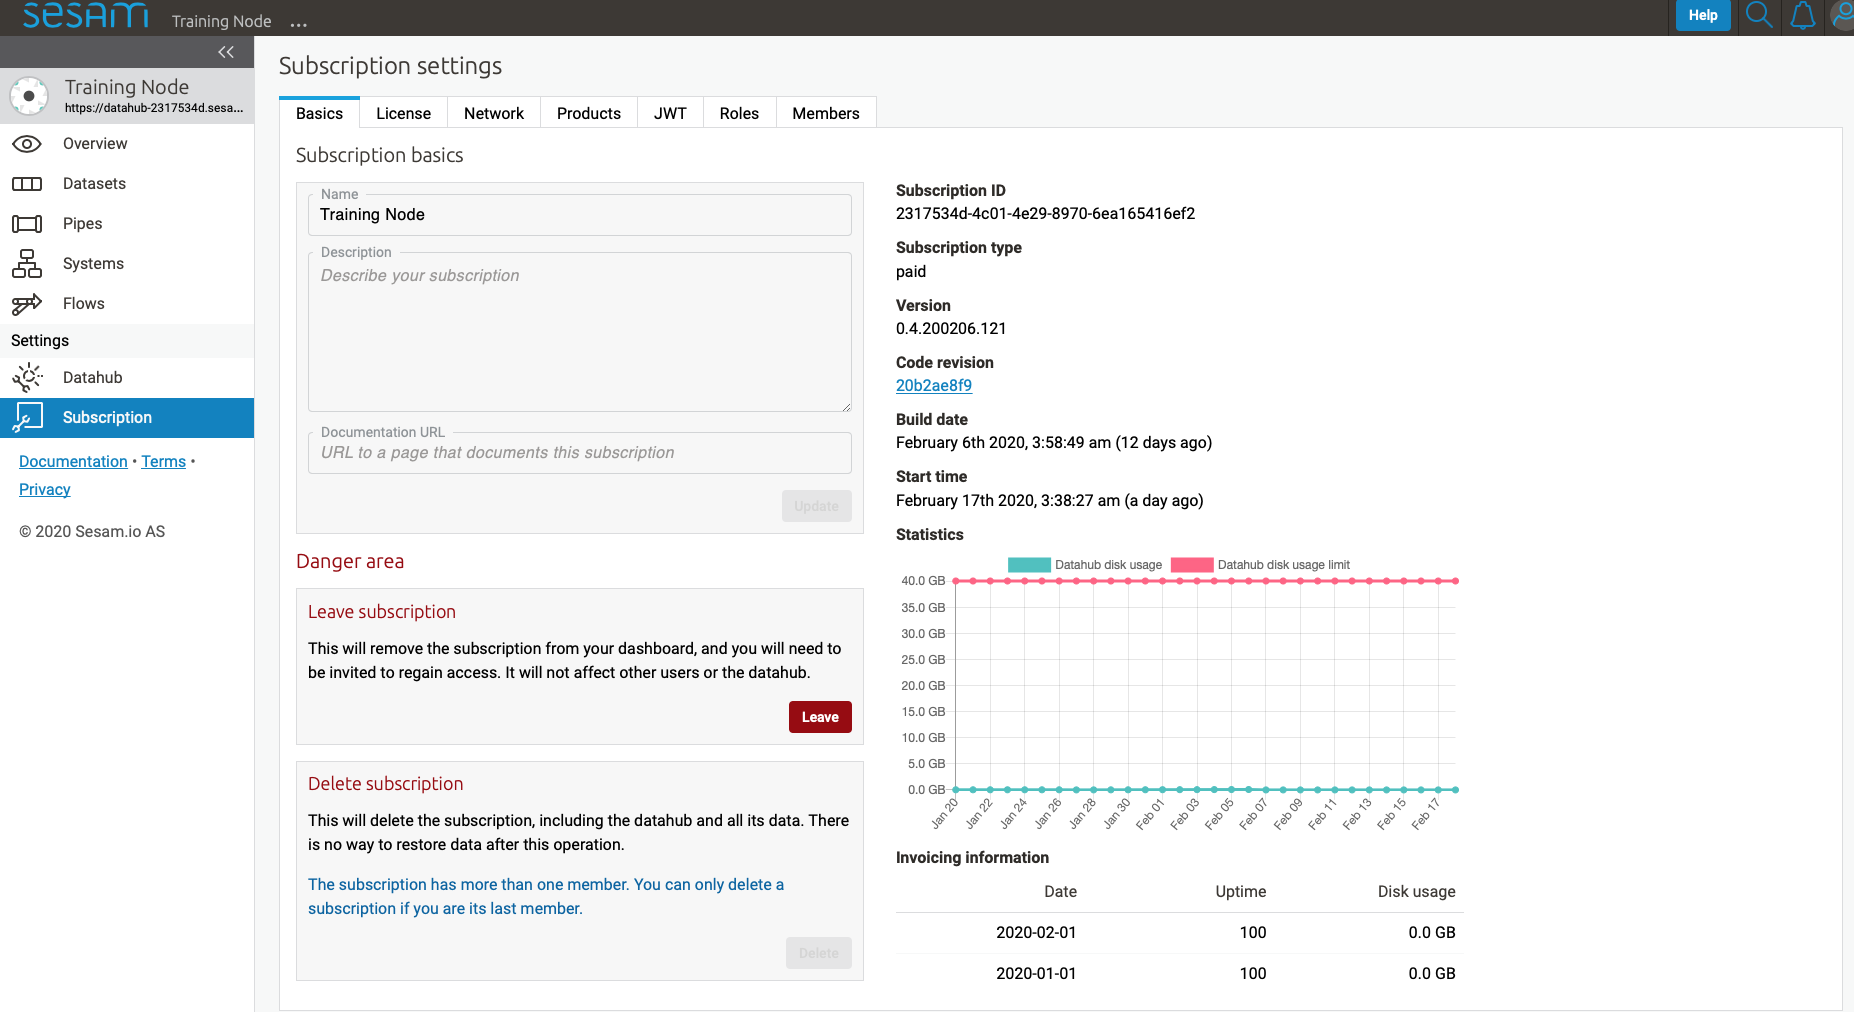
Settings
Lastly, Sesam has Settings for both Datahub and your Subscription.
Datahub settings is for managing queues, logs and permissions for your subscription. It also manages variables for various systems and metadata settings.
Subscription settings is for managing for instance license, JWT token and Network configs.
User accounts
In order to use the Management Studio you first need to log in with your user credentials. You can either authenticate via a third party authentication provider (as for example Google or Azure), or create a user-account directly in the Management Studio.
Your user-account is uniquely identified by the email-address. That means that it is possible to use multiple authentication providers to log in as the same user, as long as the user credentials from the various authentication providers contain the same email address.
This comes with a small caveat: If you create a user-account directly in the Management Studio you are not required to verify that the email address you specify actually exists and that you own it. That basically means that anyone can claim to own any email-address, including addresses that actually belongs to someone else.
On the other hand: most of the third party authentication providers supplies a verified email address.
To avoid someone else to be able to log in with your email-address, the first login with a verified email-address will disable any unverified user credentials that has been previously used. All other settings on the existing user account will be kept, though.