Getting started with Sesam’s GDPR Platform
Introduction
With Sesam’s GDPR Platform you can handle your company’s GDPR responsibilities. This guide will show you how to set up processing of incoming data requests from the company’s data subjects.
Setup
Go to http://portal.sesam.io and click on sign up.
Once you have signed up, contact support to create your GDPR subscription.
Once you have acces to the GDPR portal, navigate to settings to set
nameof your GDPR portal and add adescriptionthat will be seen by the data subject.
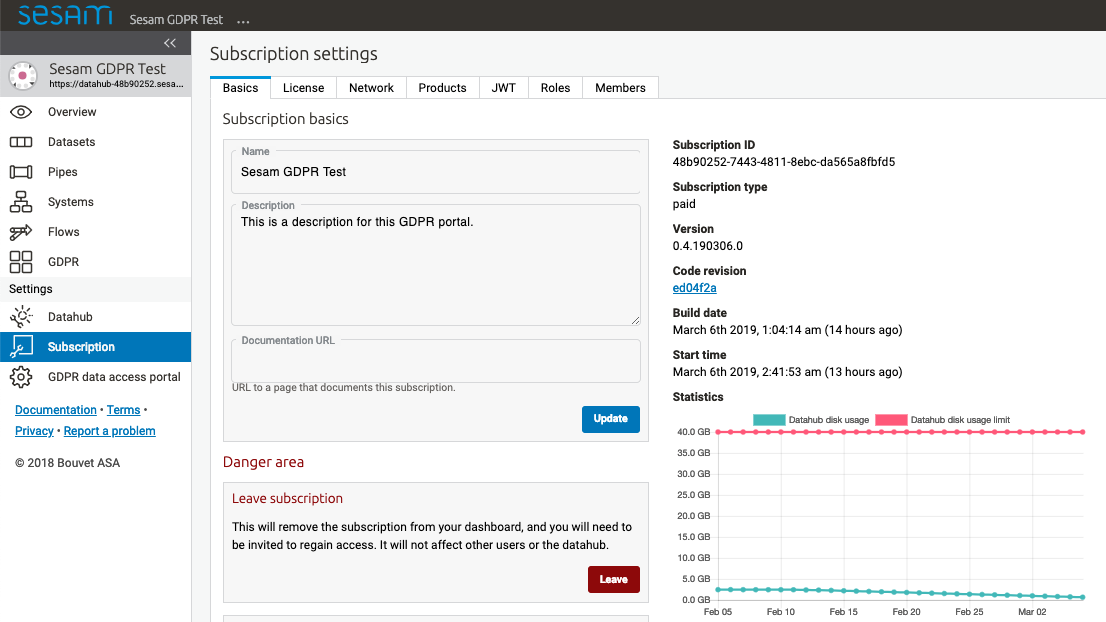
Select
GDPRin the left column navigator and in theSetuppane fill in yourdomain name.
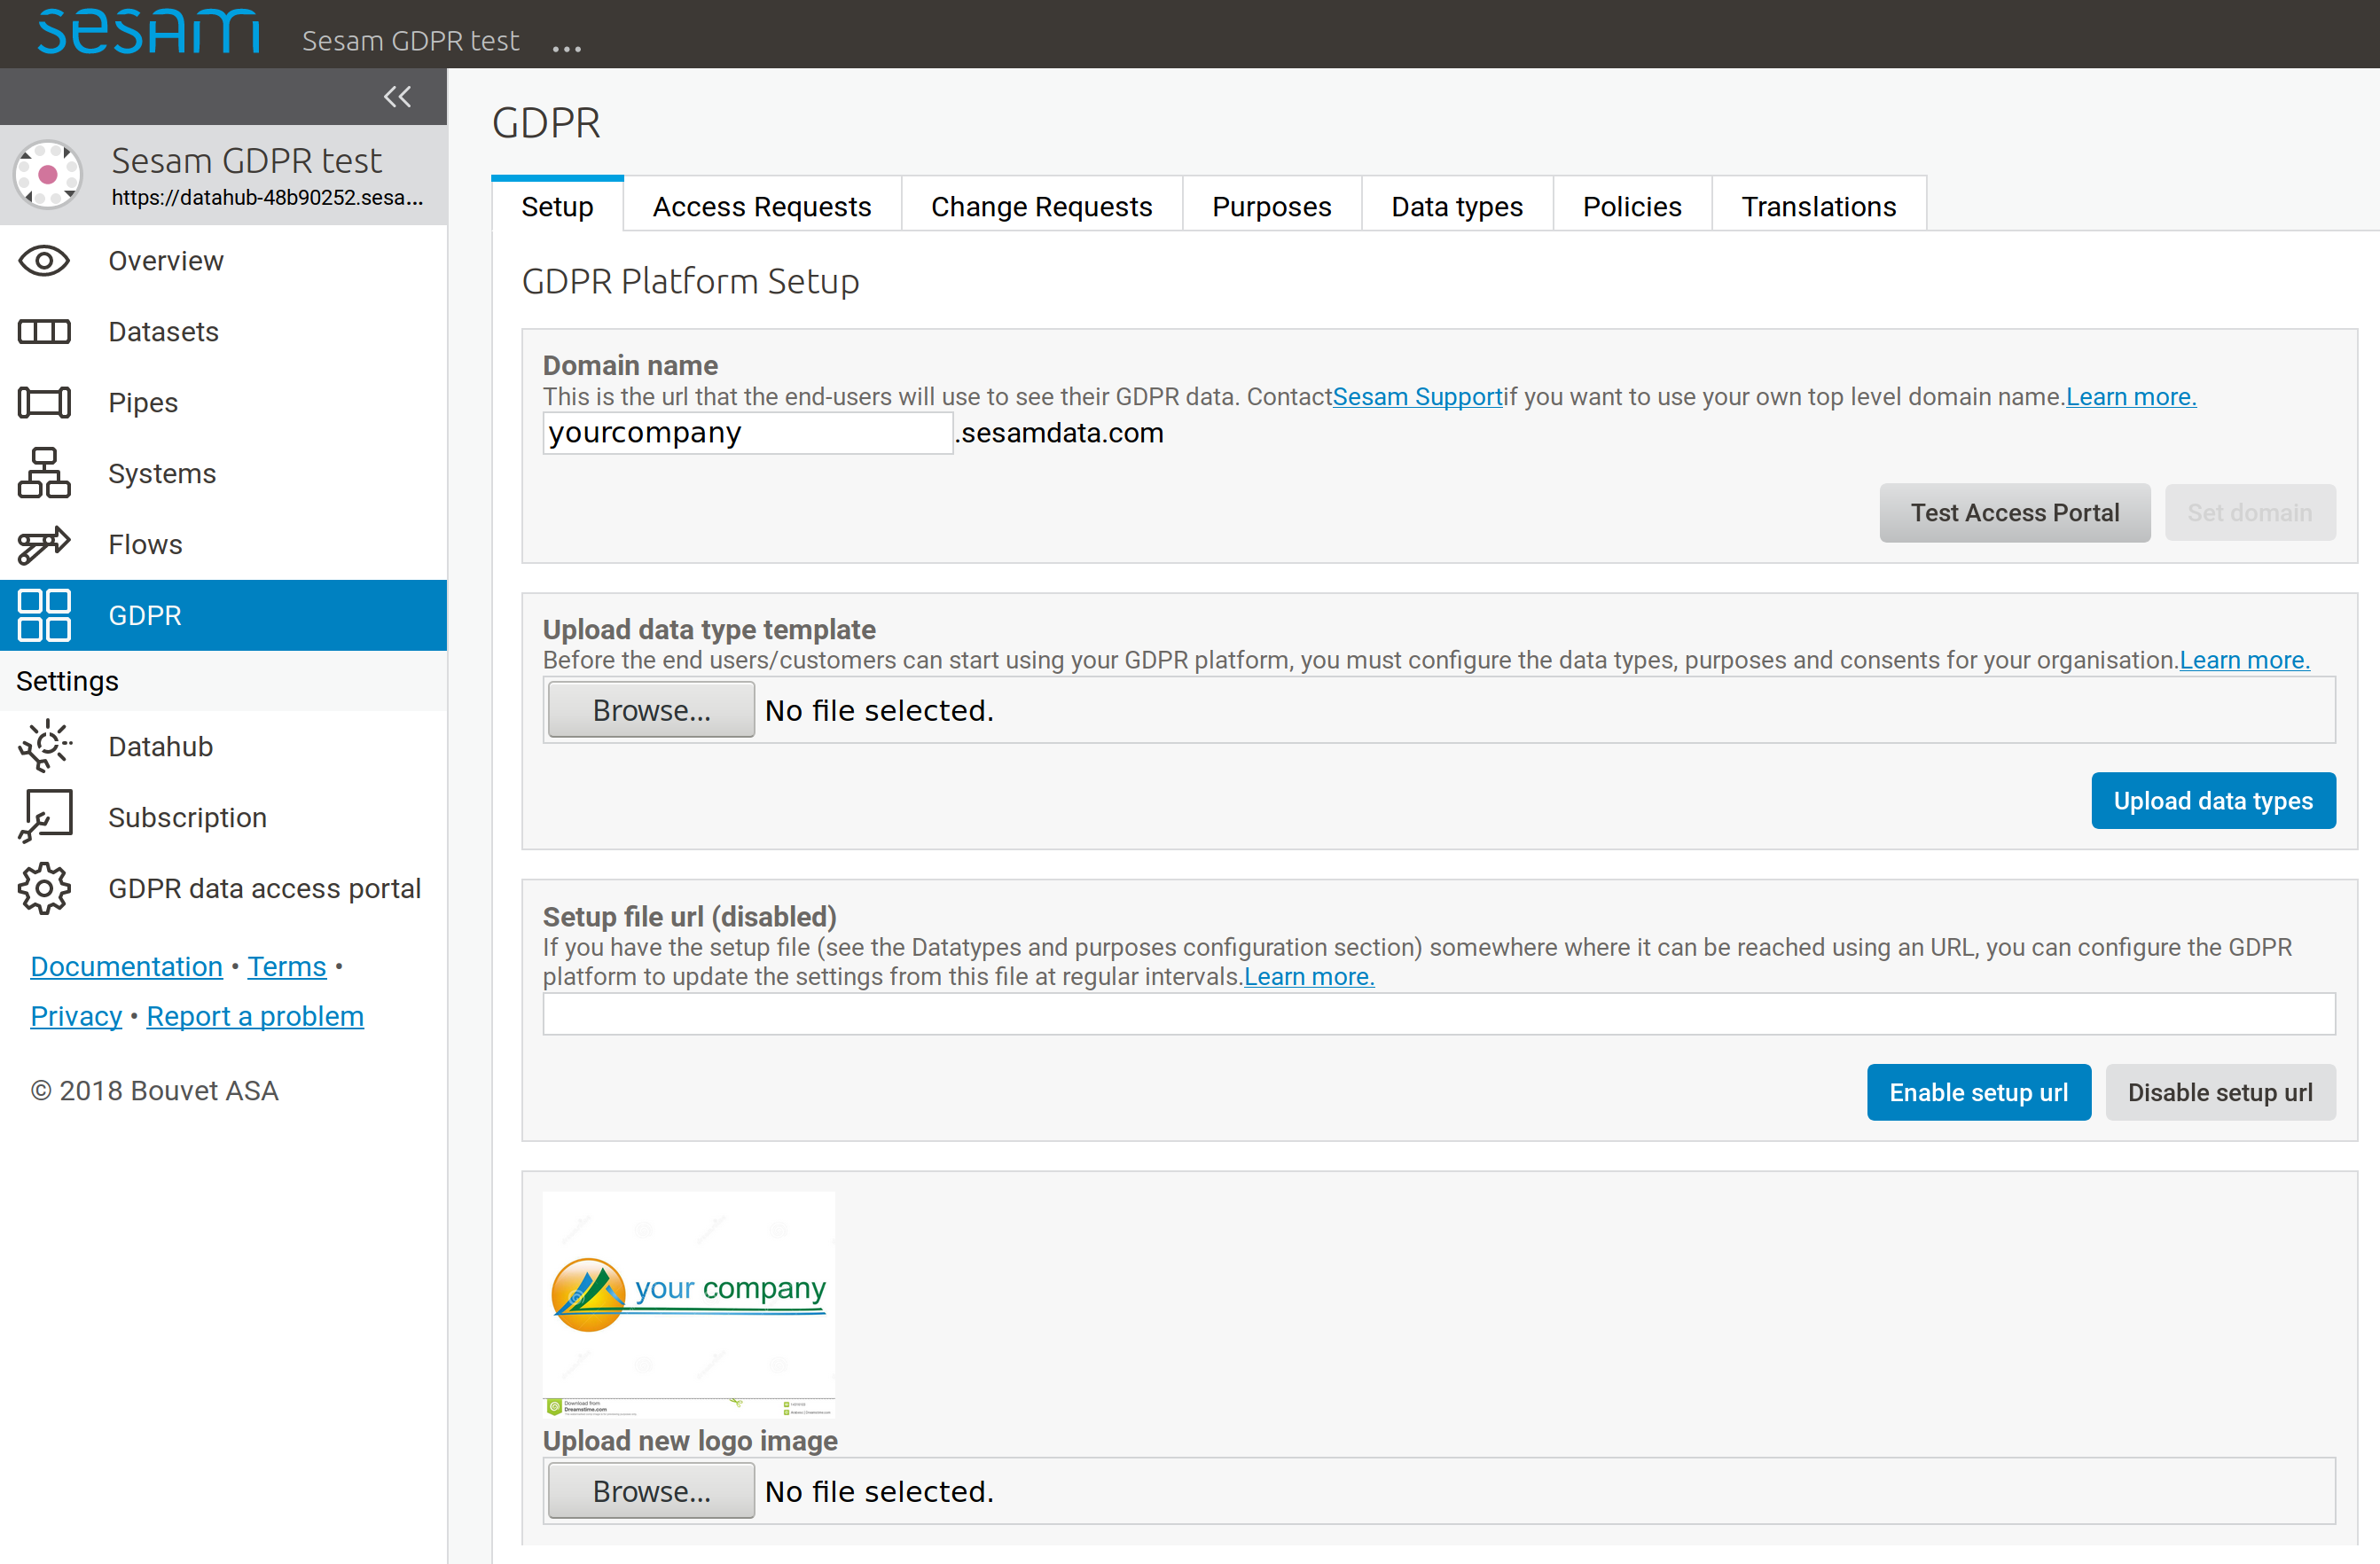
The domain name is the internet address (DNS) where your GDPR data access portal should be available to the data subjects. You can choose any name you want, as long as it’s not already in use by someone else. Your GDPR data access portal will then be available on the web (e.g. https://your-selected-name.sesamdata.com).
You can customize you portal by uploading your own logo and selecting colors further down the page.
Purposes
You need to identify what are your systems, which types of personal data are in those systems and what purposes gives you the right to have the personal data.
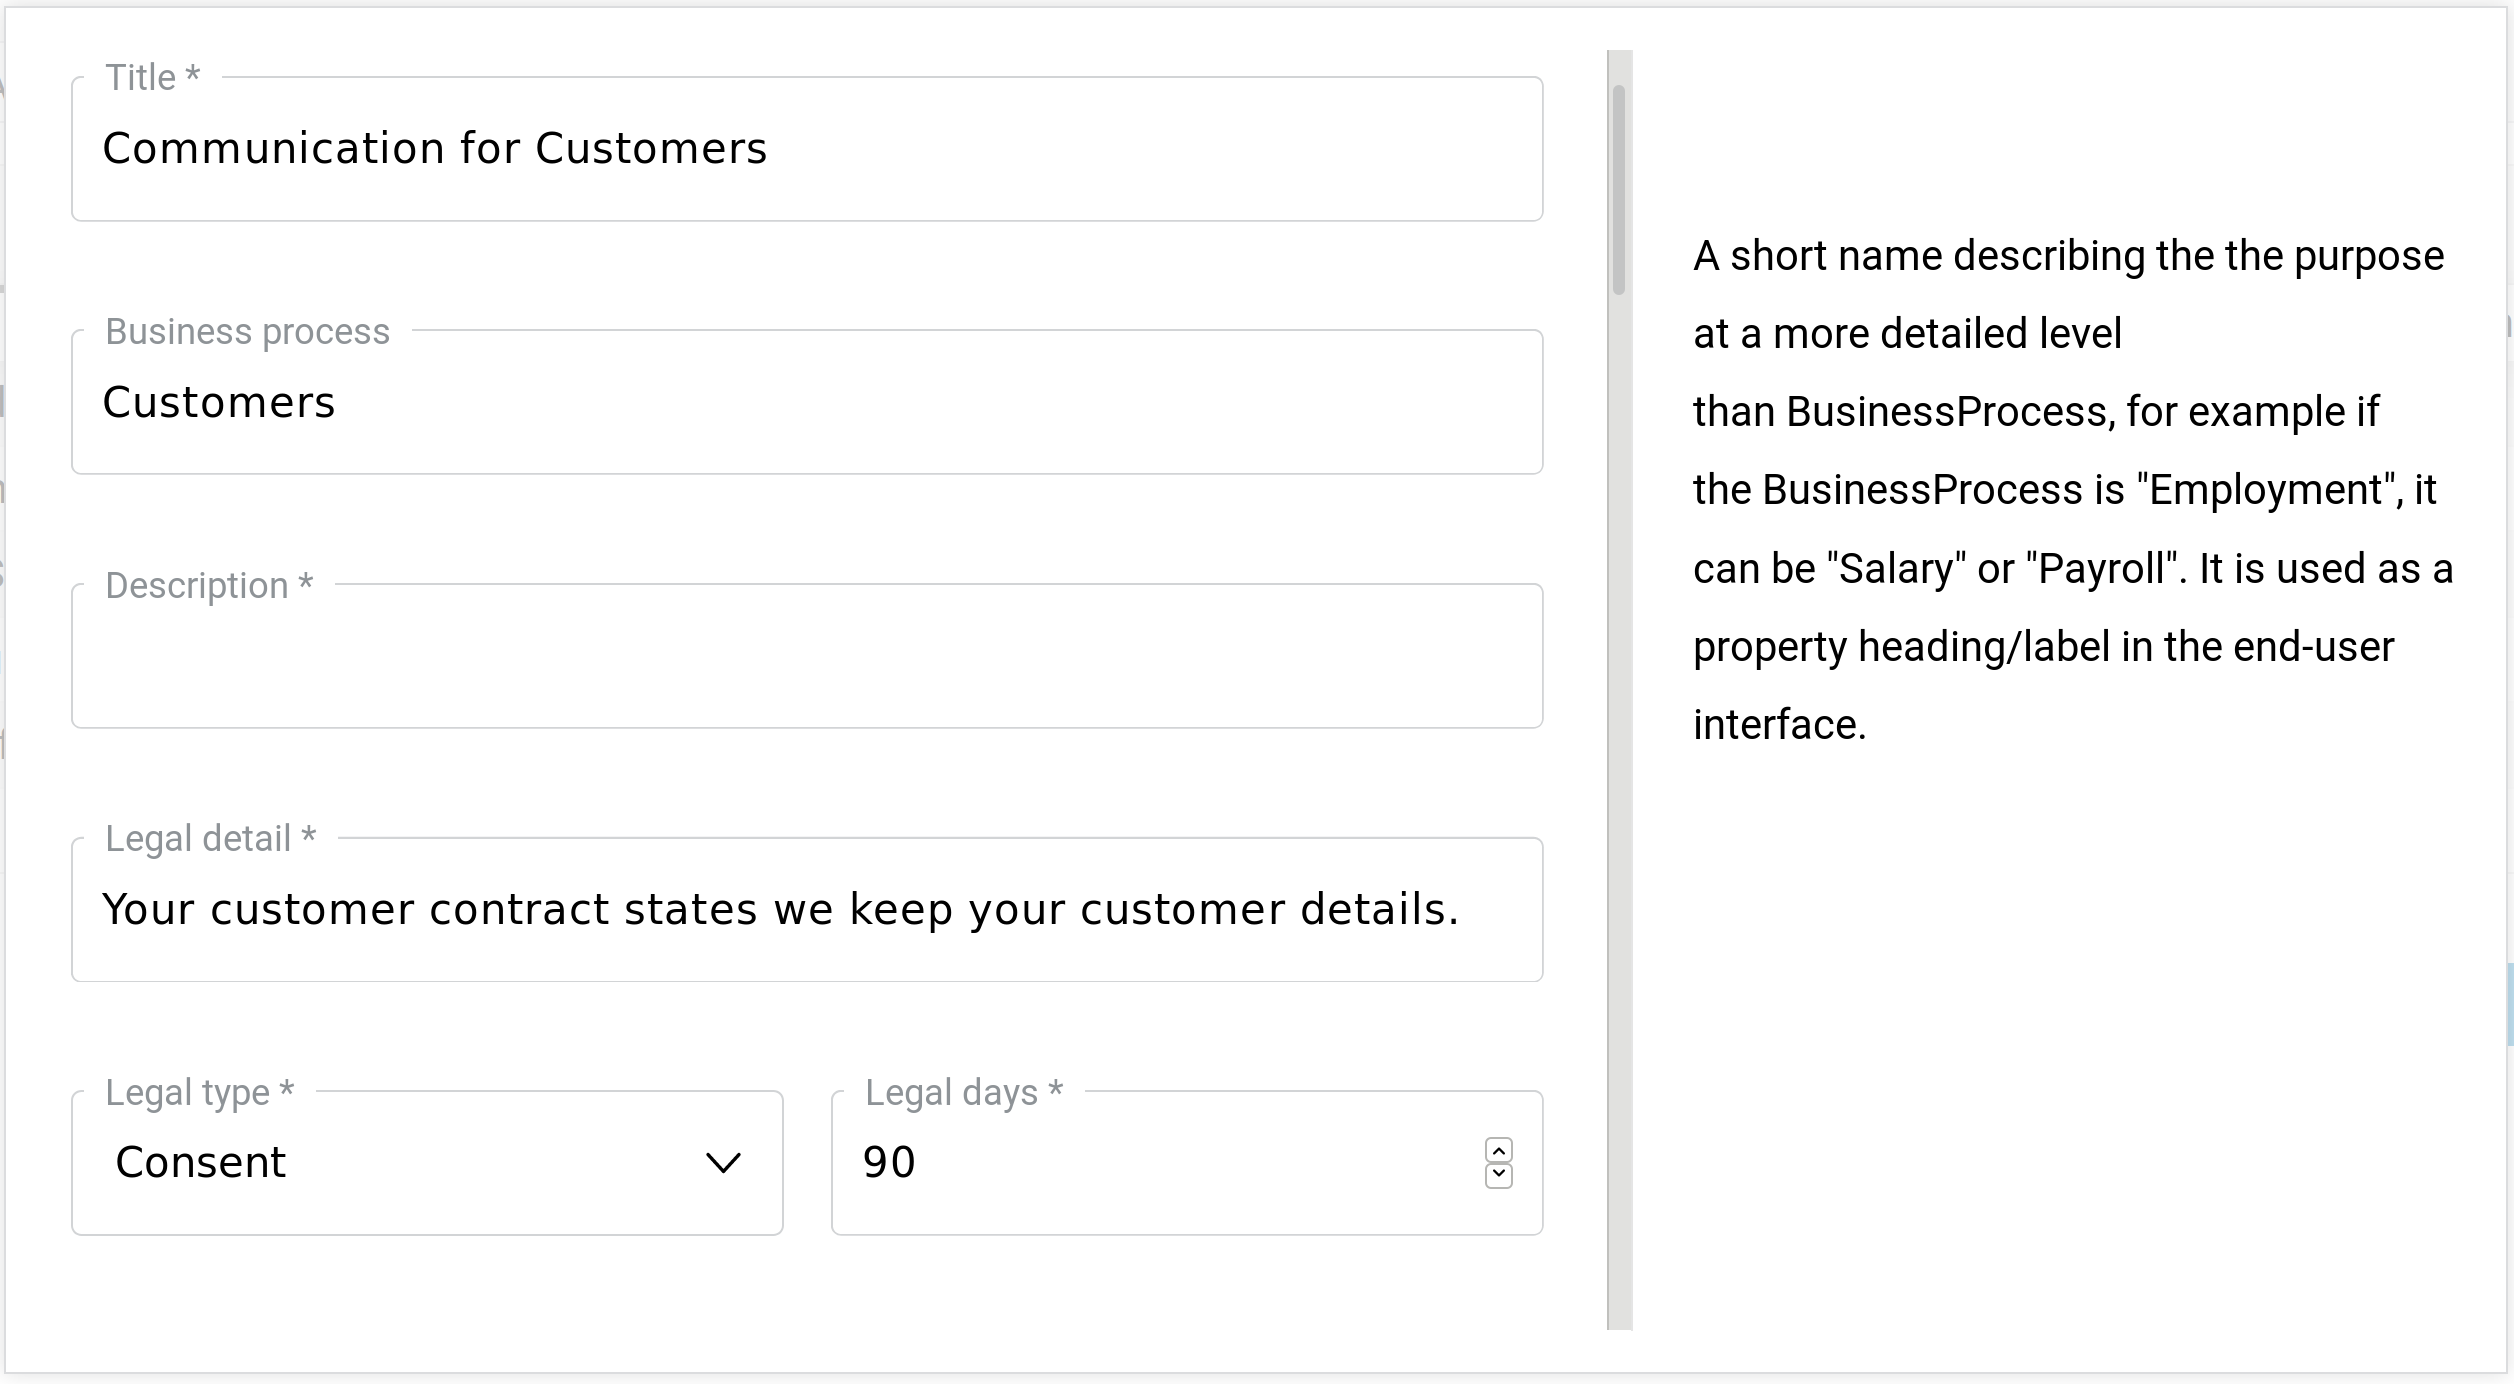
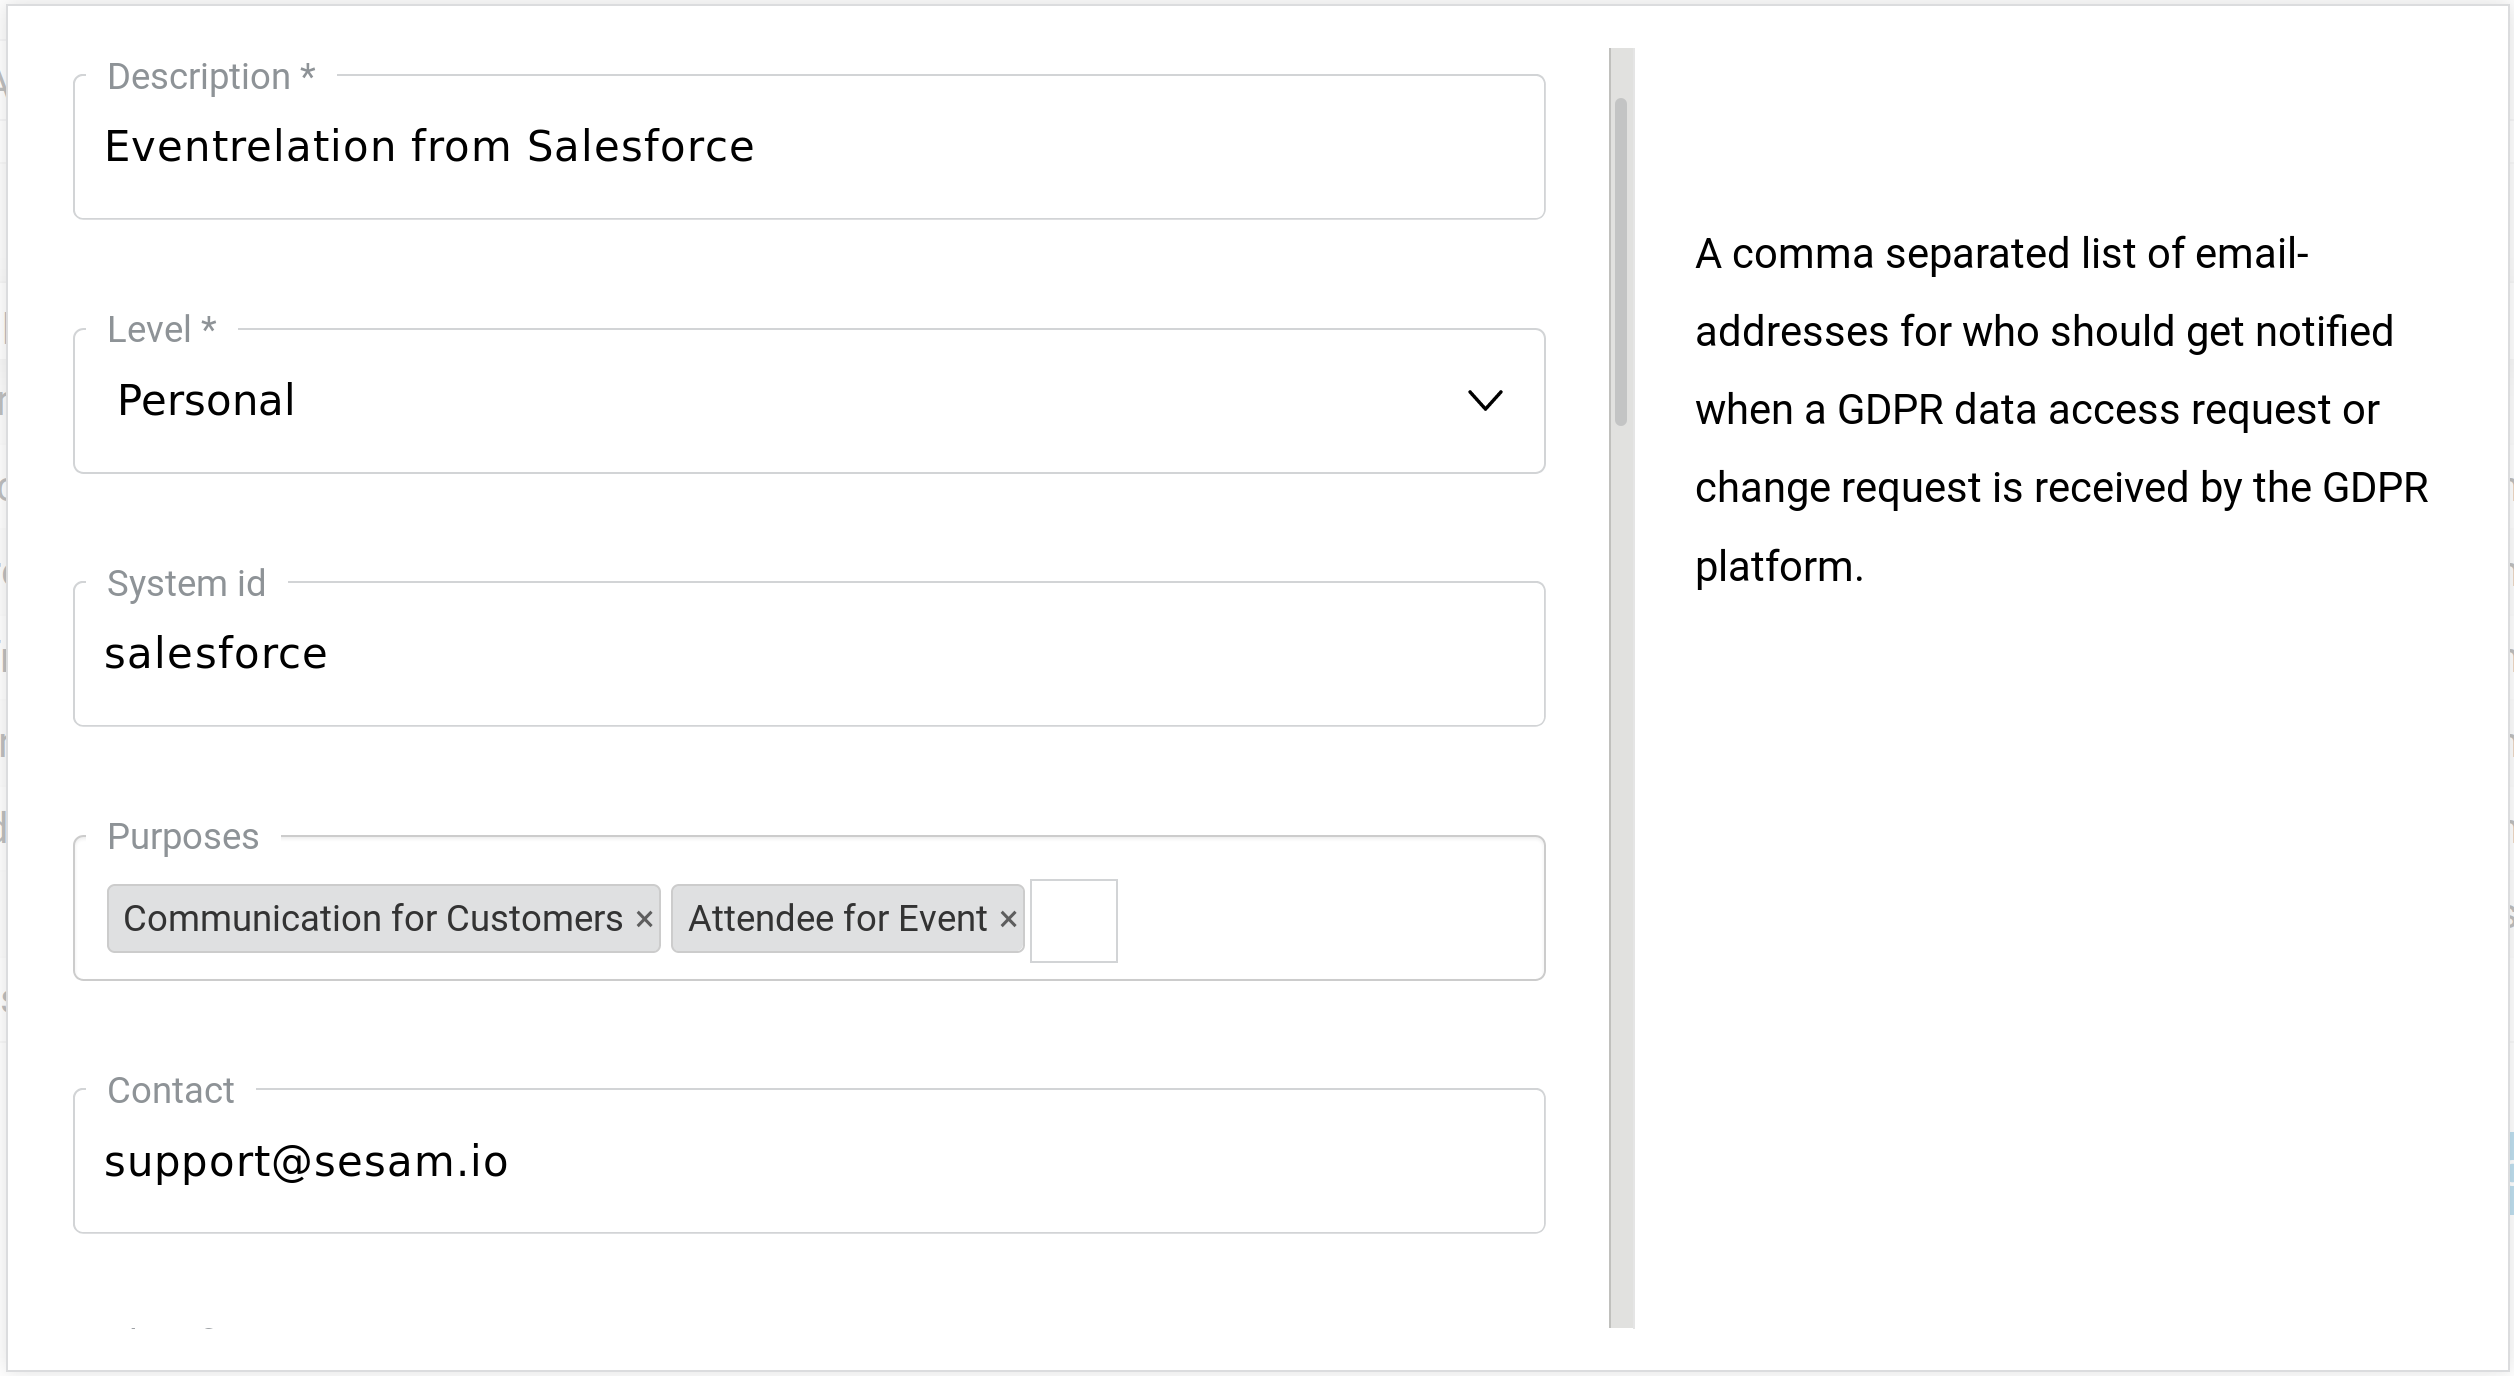
Navigate to the Purposes tab and create populate it with your purposes for having the data in your systems. The creation webform provides explanations for what each field represents. Below is an image of the purpose creation template. Make sure to fill in all fields marked with a star (*).
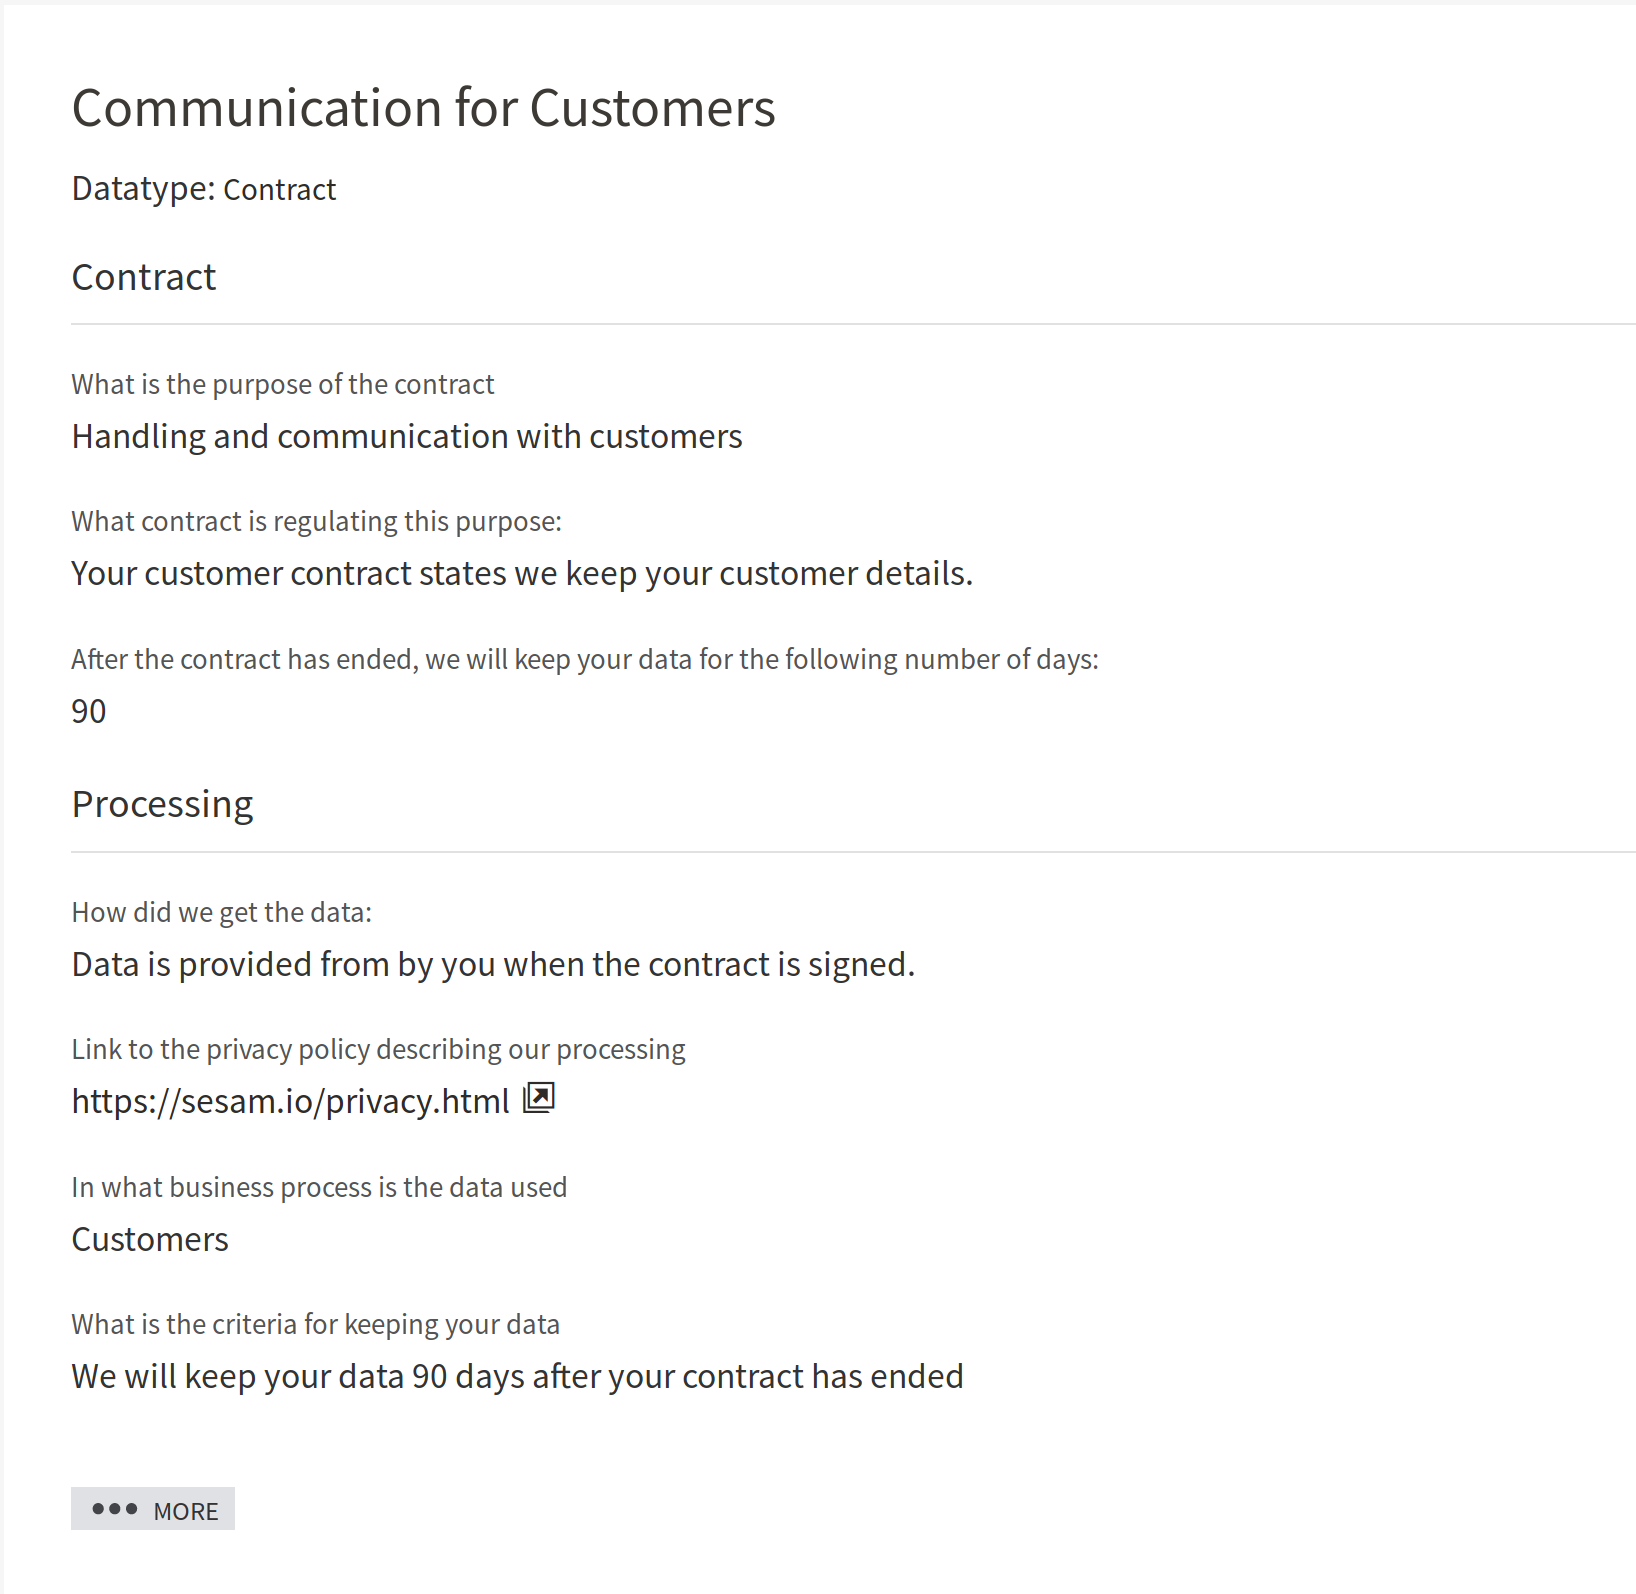
When a data access request has been processed the purpose is displayed to the data subject like in the following image:
Data types
Next, go to Data Types and fill in the data you have in your systems. Make sure to fill in all fields marked with a star (*). In the Purposes field you select the purposes you have created that apply to the data in question. The email-address(es) supplied in Contact will receive an email when somebody makes a request for this data.
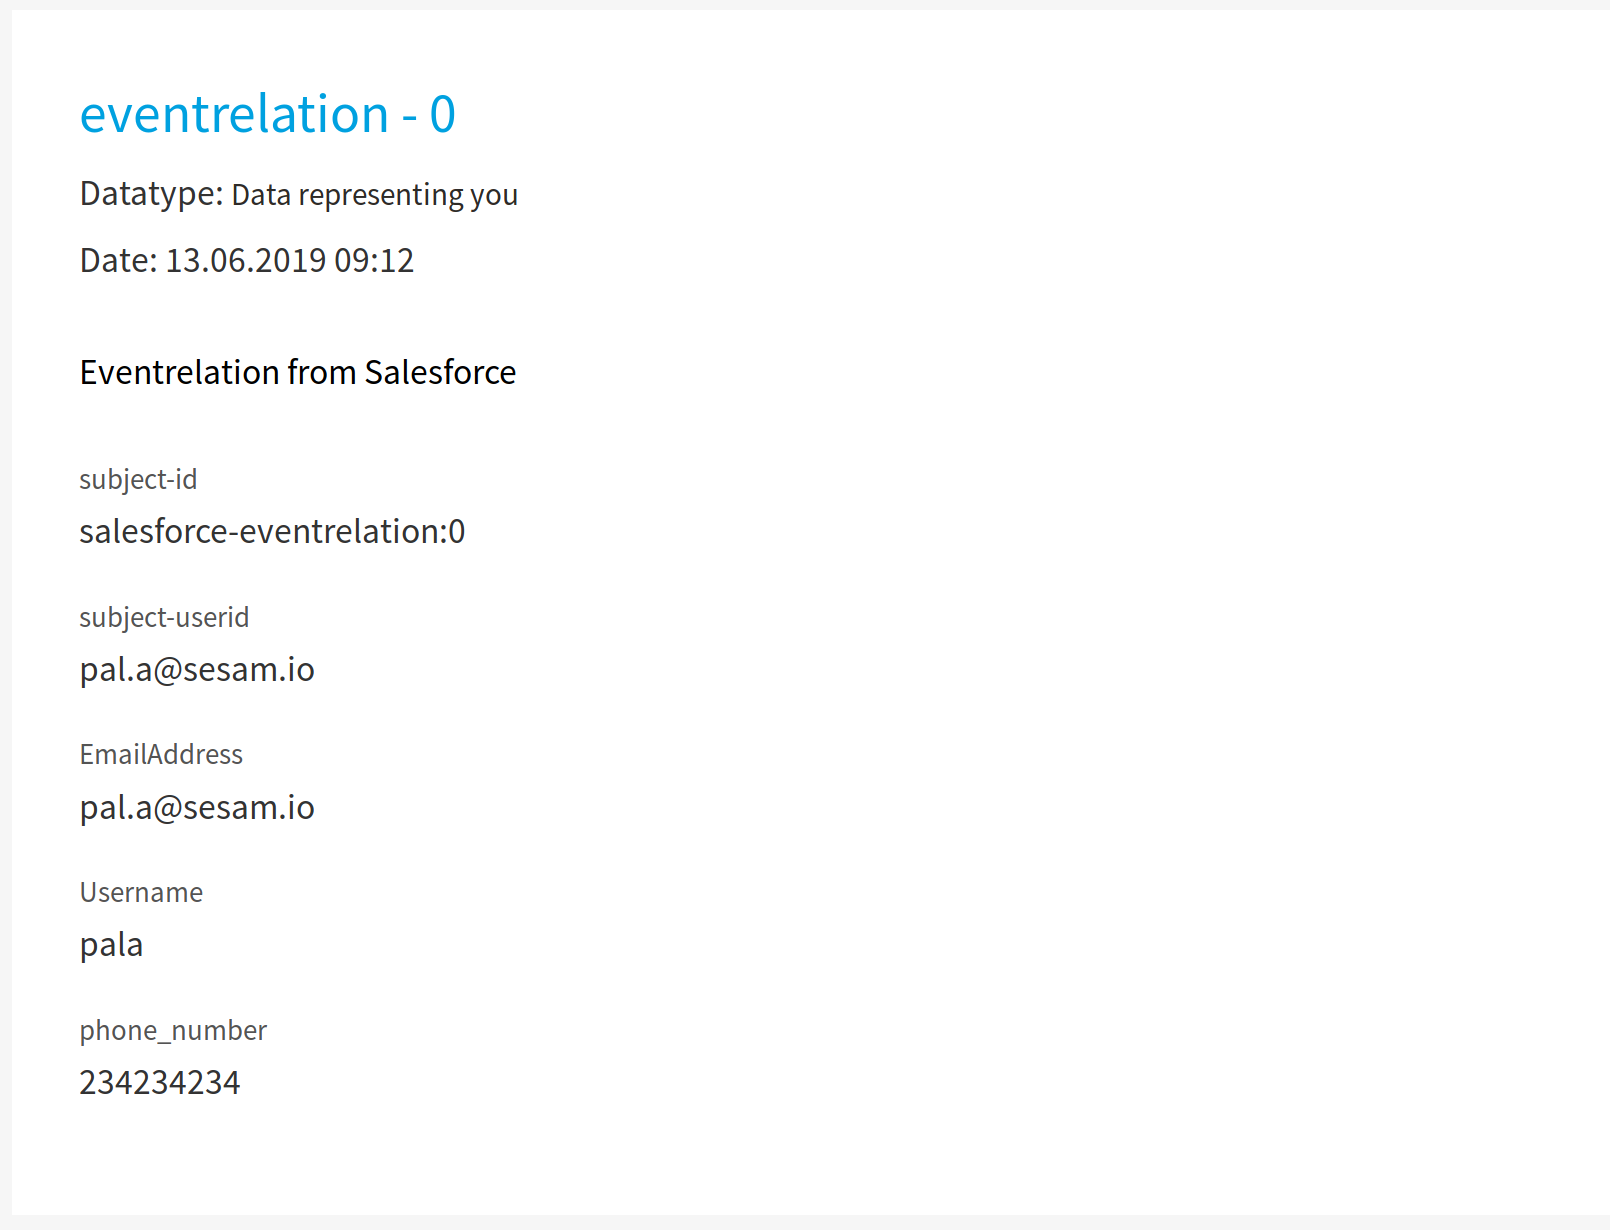
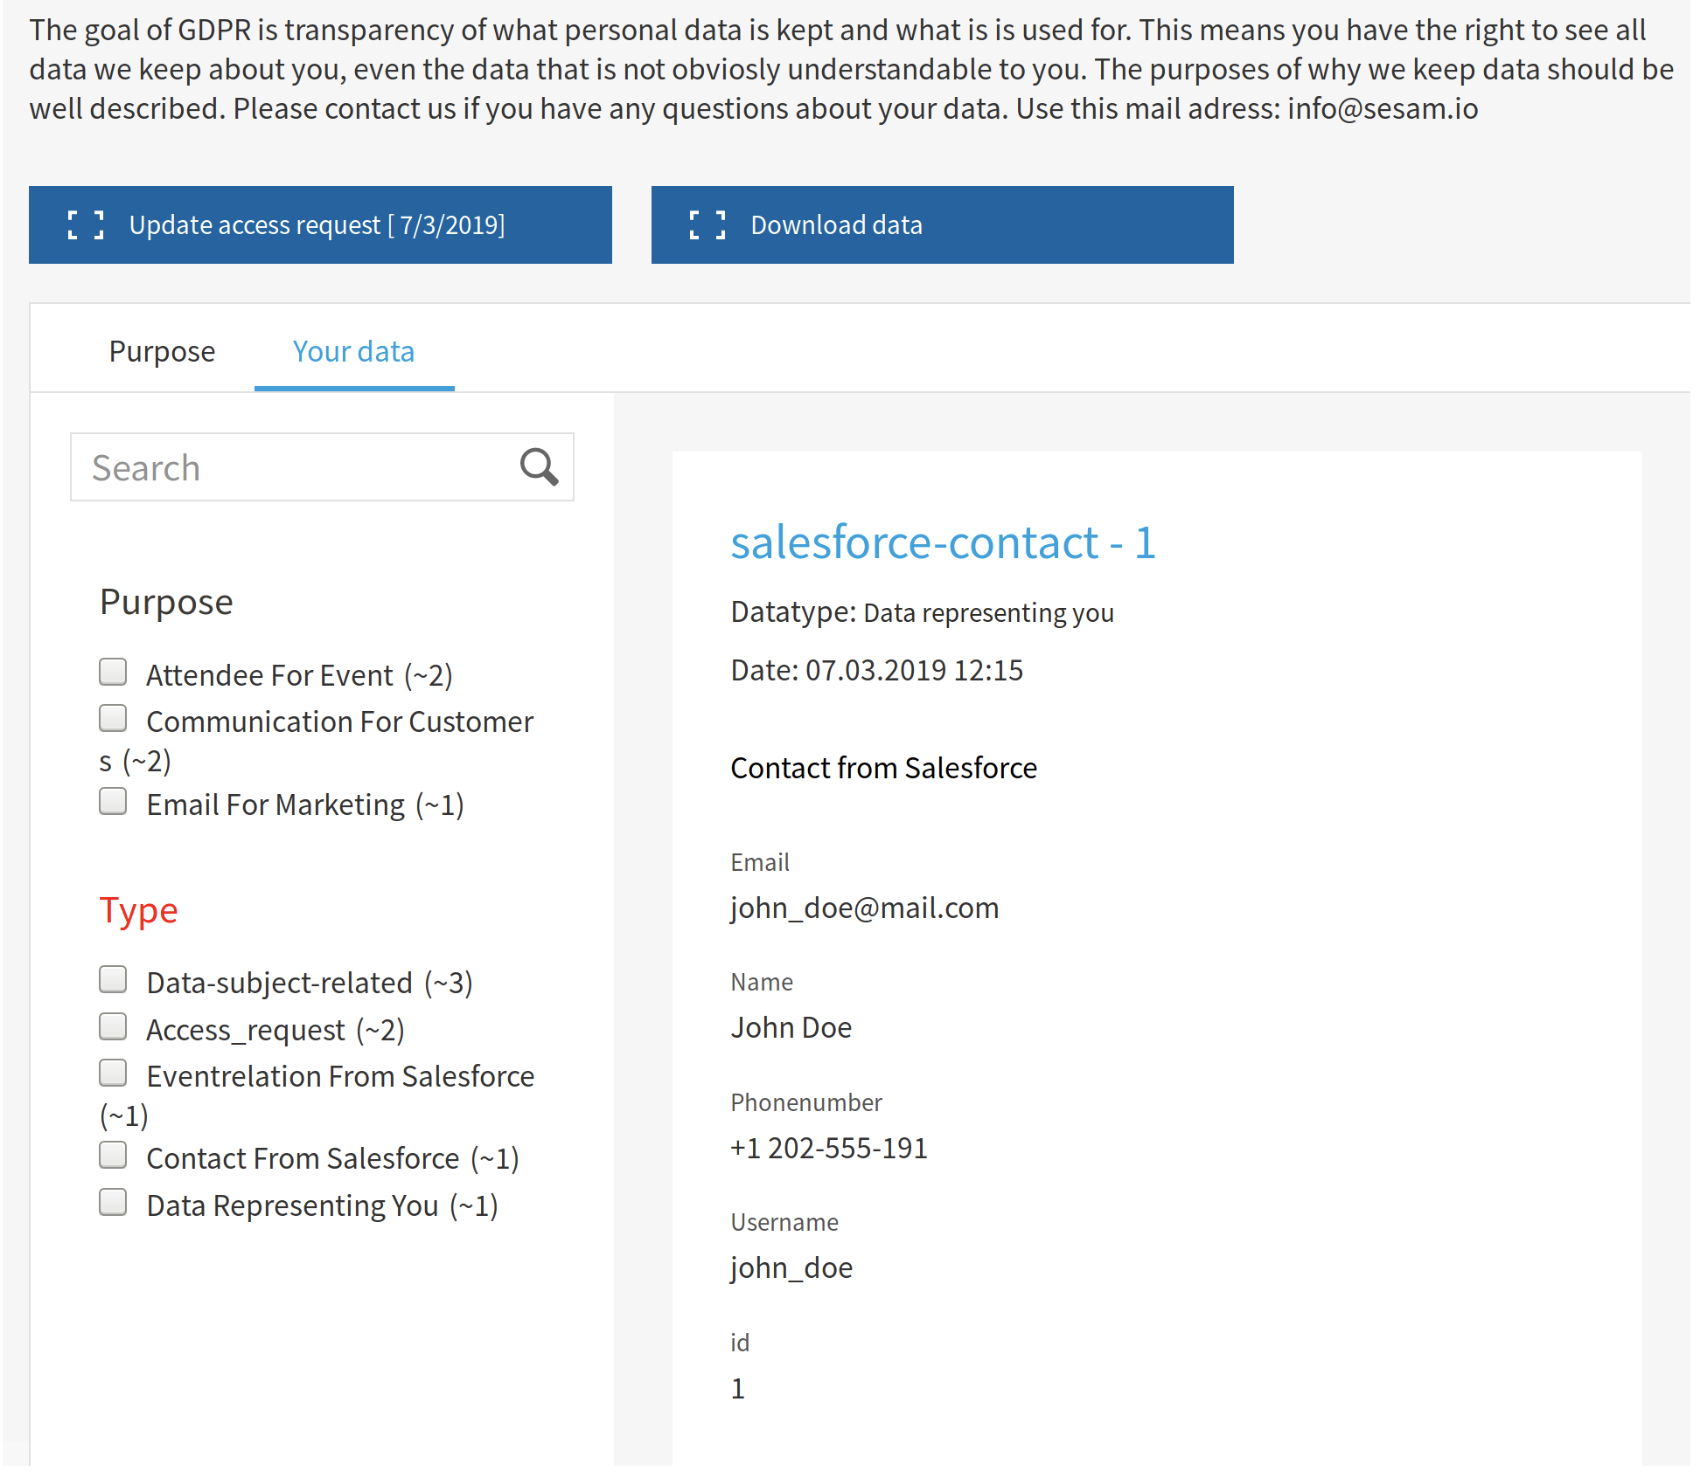
The data related to the data subject can then be displayed like this when a data access request is served:
Your GDPR portal is now ready for use.
Data access request
Request data as data subject
The data subject can now log in to your portal to request their data. The URL will be the one you chose in the setup process, for example yourcompany.sesamdata.com
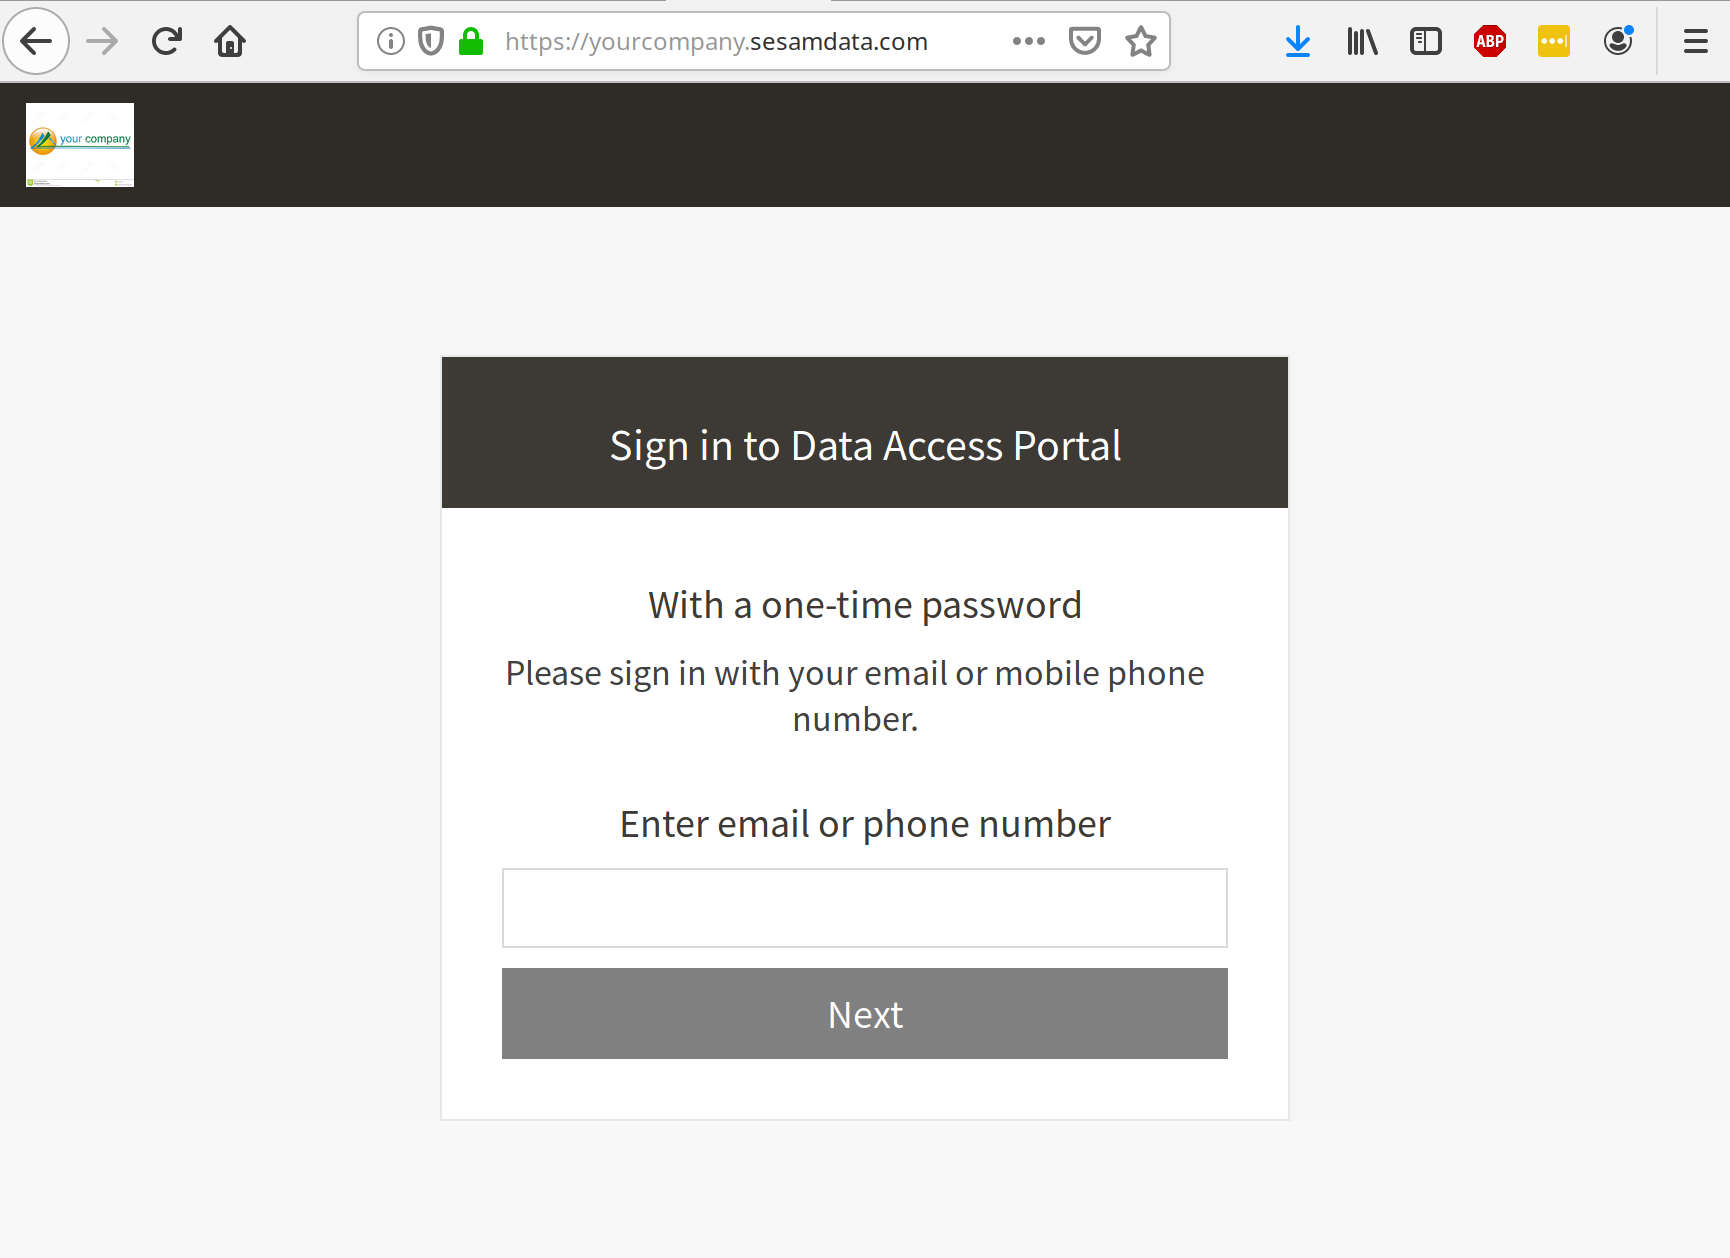
The data subject can log in with their email or phone number. This is a two-factor secure login that requires the subject to confirm a one-time password. Test logging in as yourself.
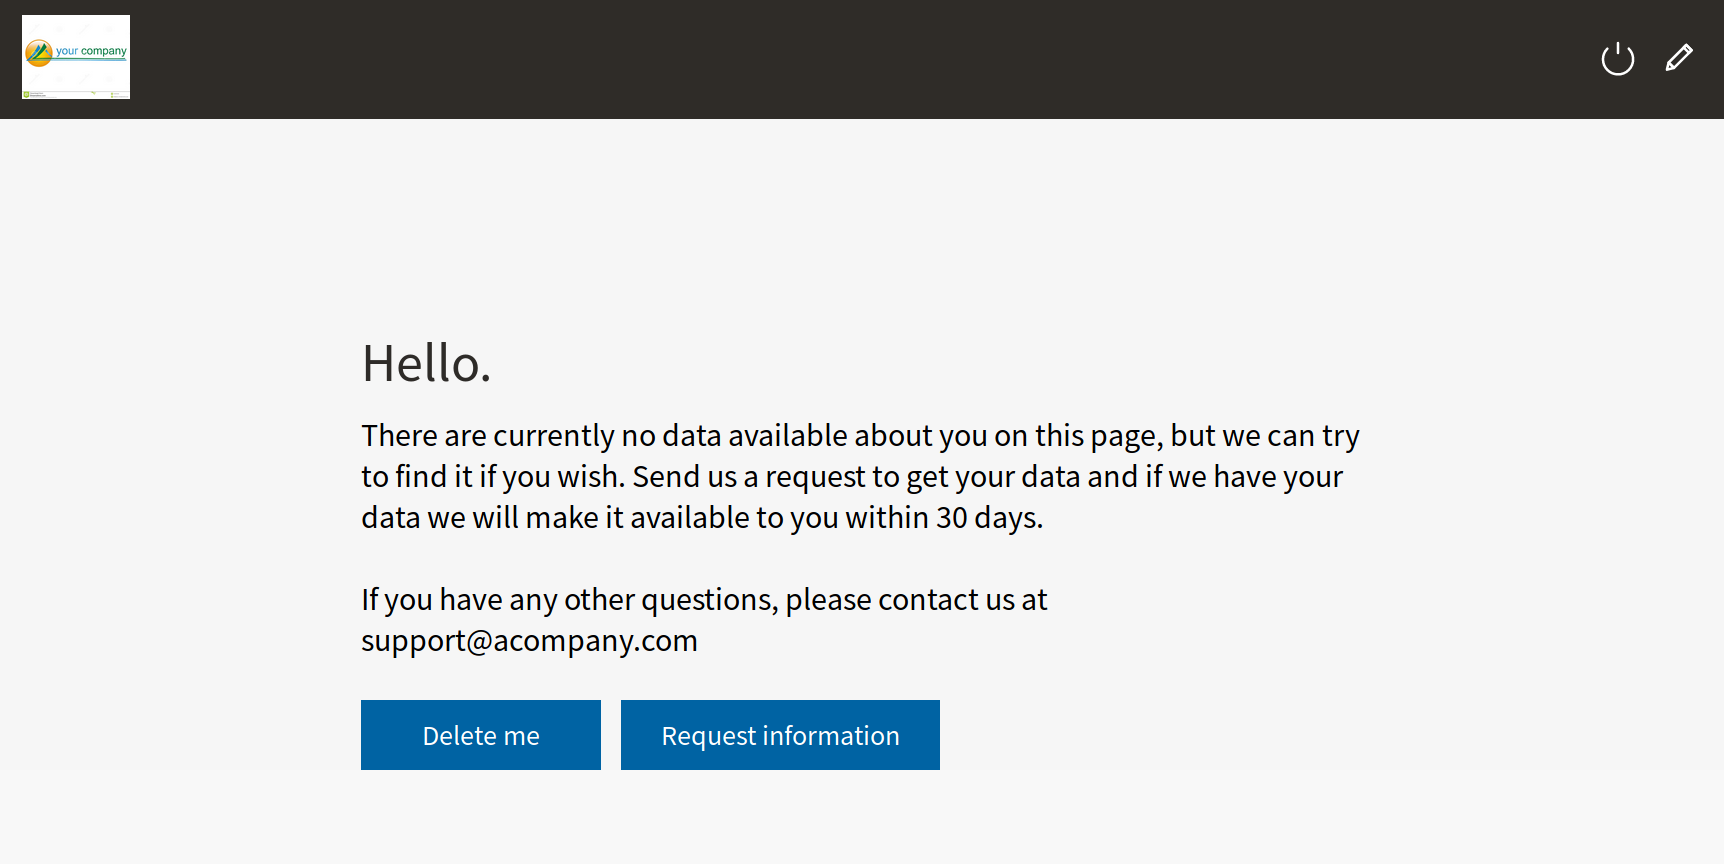
The data subject can now request their data or ask to be deleted
Handle data request as system owner
The system owners specified in the GDPR Excel setup will receive an email about the request made by the data subject.
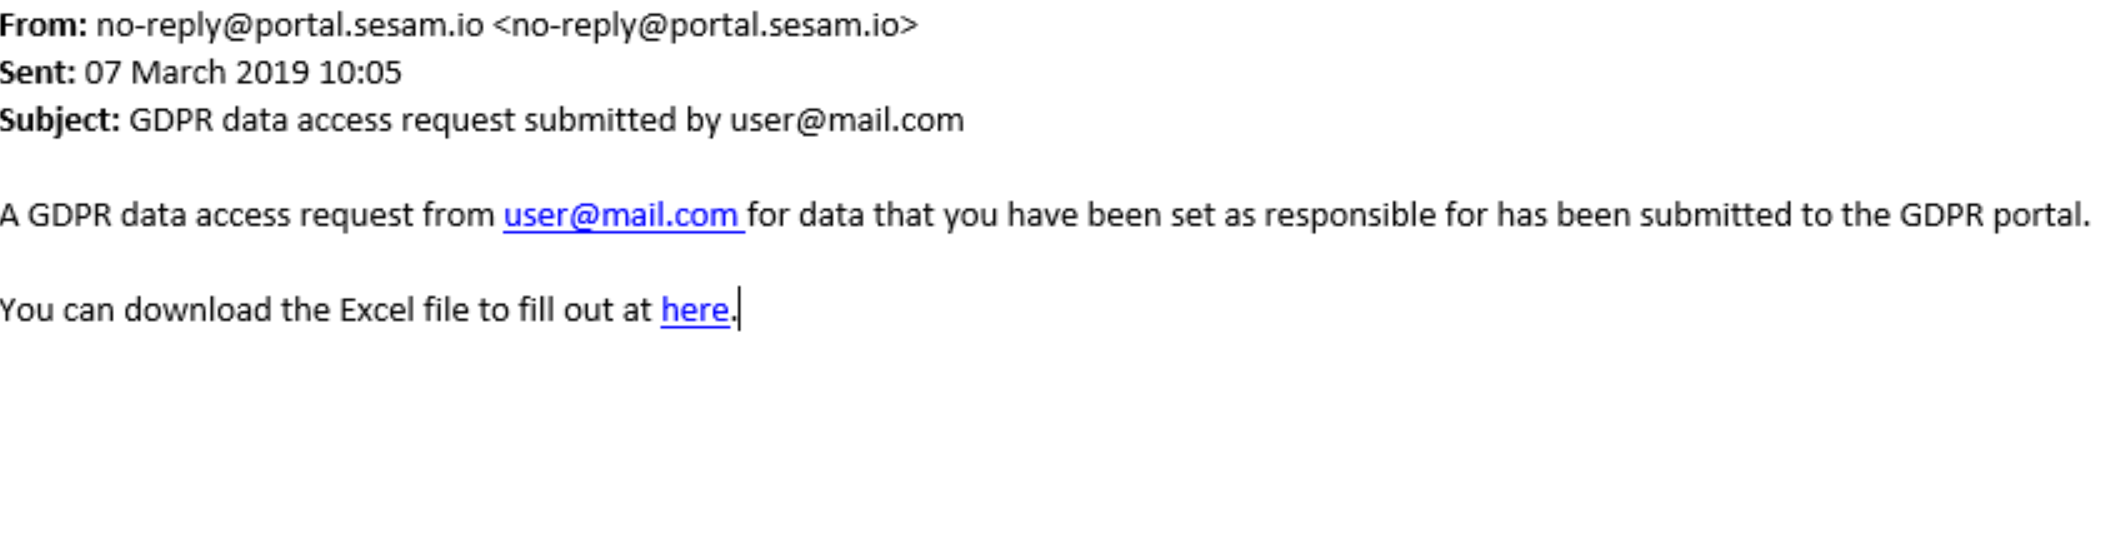
Download request template for handling the access request
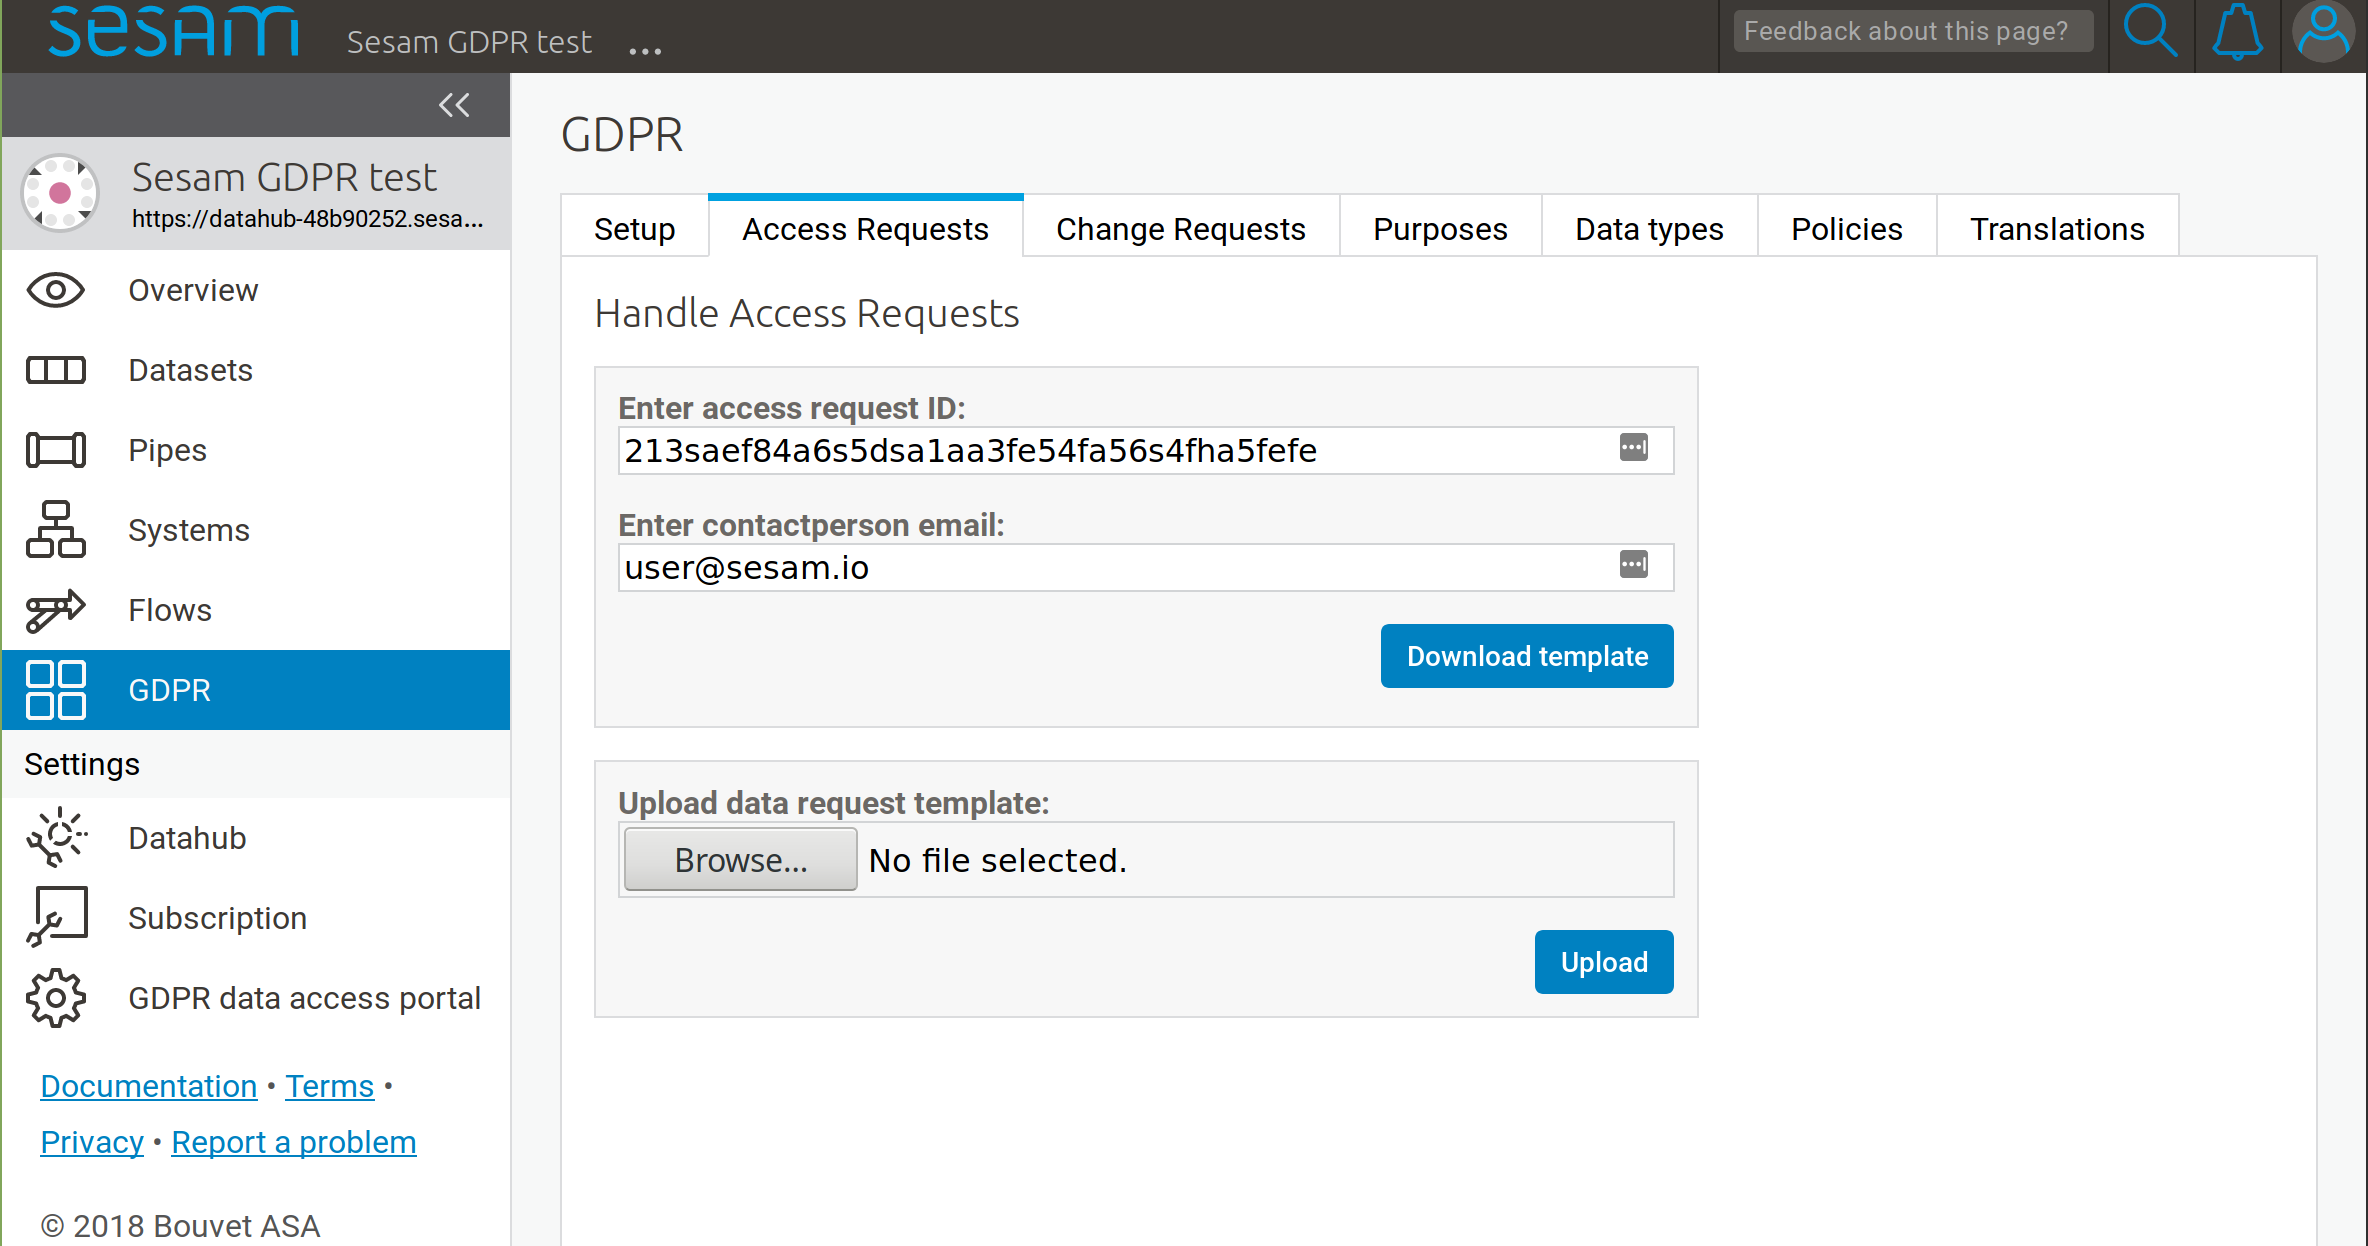
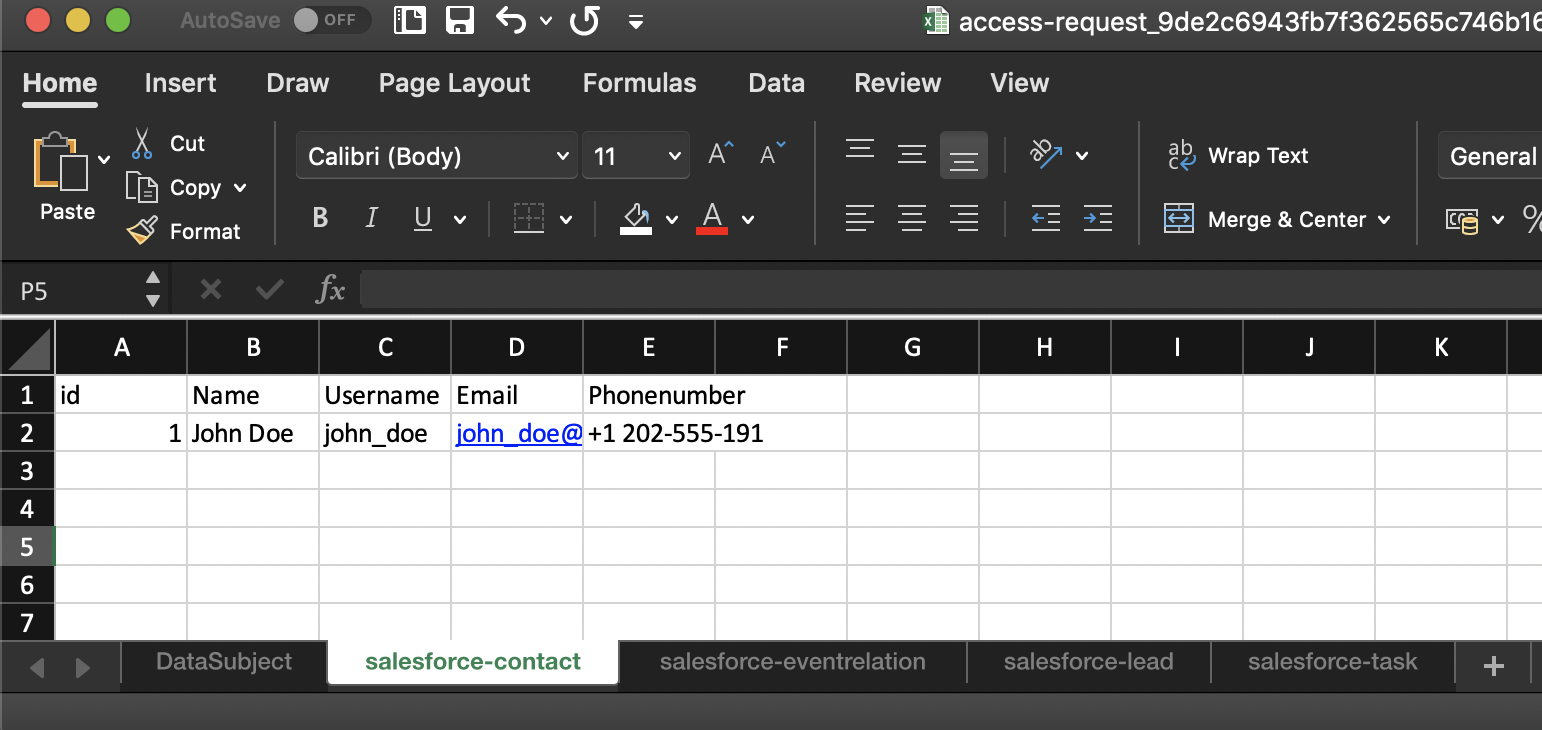
Fill in the Request template for the specific data subject. You can use field names that you find fitting and add as many columns as needed. Then save the Excel document.
Upload the filled-in Request template in the portal. The access request is now handled.
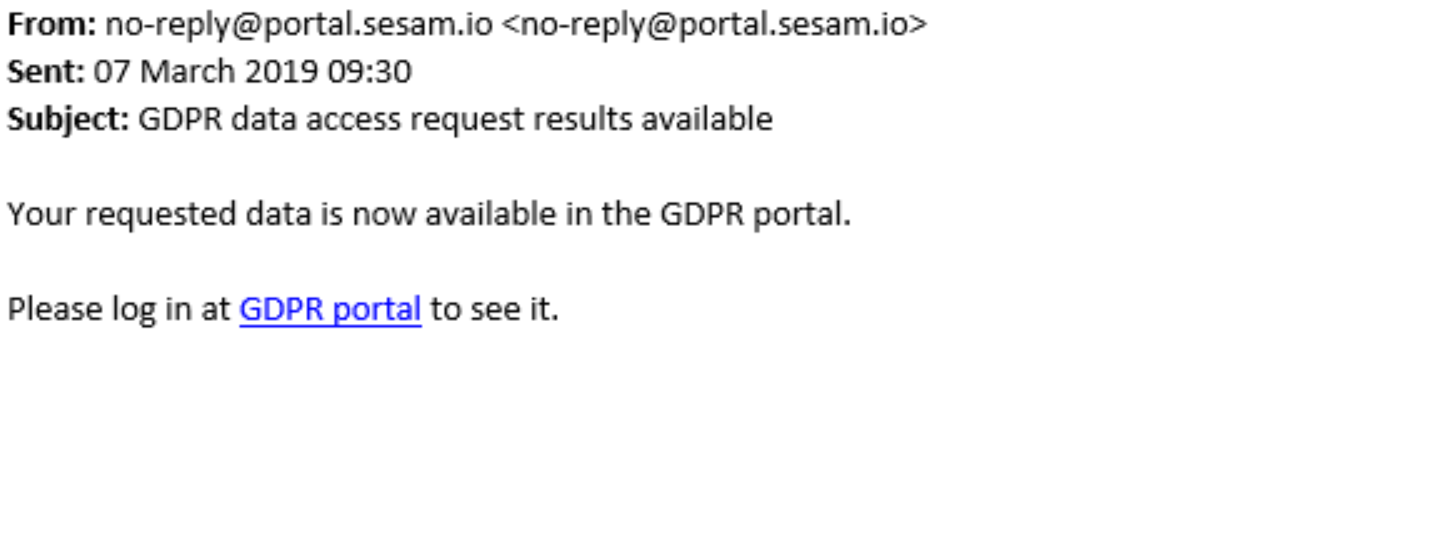
The data subject will now be informed via email or text message that the data is available.
Data displayed to subject
When the data subject logs back in he or she can now view their data and execute their rights.
Automation of data request handling
If we have an automatic version of the GDPR platform we can set it up so that it handles data access requests automatically. The data will be delivered to the data subject without human intervention. We can do this because we use the Sesam integration platform with our GDPR platform. Using the Sesam integration platform means we make a copy of all the data we want to make available for the GDPR platform into its Sesam datahub. Once the data is available in the datahub, the system can serve data access requests on it’s own.
To set up this automation we need to take care of a few things:
Import data from our data systems to the datahub of the GDPR platform
Refer to the datasets in the datahub in our data type definitions
Update a pre-built pipe
Import data
We have to copy all the data from our source systems that contain data that could be served to our data subjects. We can import this data from different types of sources like databases, APIs, CSV- or XML-files. We do this by creating “inbound pipes” that copy all the data from a source. The pipes connect to external sources through “systems” in Sesam, which serve connection strings, connection pooling, authentication etc. Take a look at the Getting started with Sesam section of this documentation if you need to learn how to configure pipes and systems to connect to external data sources.
For testing purposes we have pre-made a few pipe configurations with embedded test data. We can use these pipes to setup and test the automation with dummy data before connecting to our real data sources.
Create four new pipes and paste the configurations provided in the links below. We can change the values of the first entity of the embedded data in these configs to match our own email address. That way we can test the platform as a data subject ourselves.
Link data to data subjects
In our data type definitions we now also have to specify from which dataset the data is pulled. To do this we need to create and populate two extra fields in our data type definitions: TypeID and Identifiers . We can do this as we create the data types or we can edit them at a later time.
The TypeID field needs to have a value matching the rdf:type of the data, while the Identifiers field needs to contain the namespace and identifier of the attribute of the data we refer to in the data type definitions. See the image below for reference:
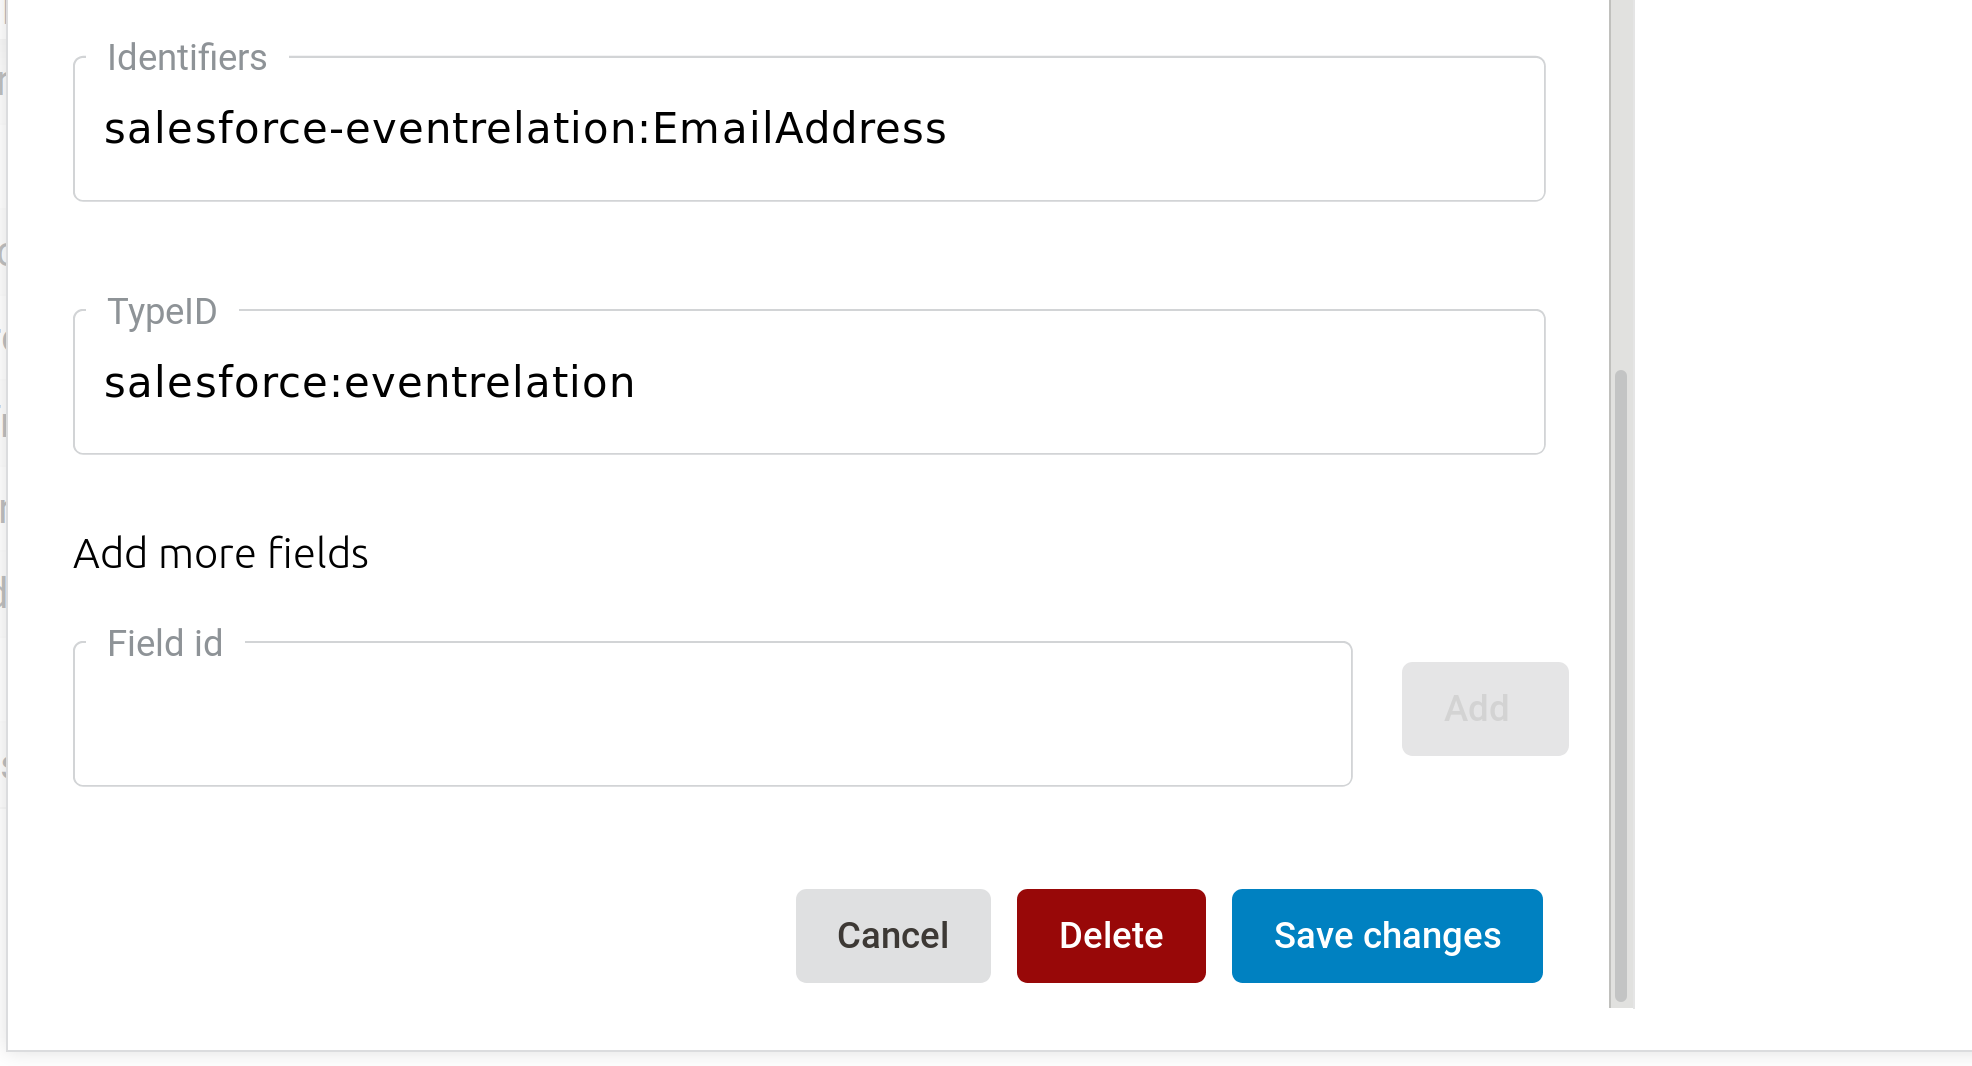
These identifiers are what connects the data in the datasets to the data subject that is requesting their data. As you can see we have chosen EmailAddress in this example, but other attributes may be as-well or better suited for identifying data subjects. It could also be multiple identifiers separated by comma (no spaces).
Excel file data type definition alternative
If we wish to use an Excel file instead of the portal user interface to upload data types we then have to use the GDPR automated Excel setup template file. In this template we need to populate the same two fields as described above.
Update pre-built pipe
Open pre-built pipe
custom-subject-dataand update this pipe with all our input datasets. Here we add four datasetssalesforce-contact,salesforce-eventrelation,salesforce-leadandsalesforce-taskas our sources. After updating the pipe it should look like this:
{
  "_id": "custom-subject-data",
  "type": "pipe",
  "source": {
    "type": "merge",
    "datasets": ["salesforce-contact sc", "salesforce-eventrelation se", "salesforce-lead sl", "salesforce-task st"],
    "equality": [],
    "identity": "first",
    "strategy": "compact",
    "version": 2
  }
Now we can check the output of another pre-built pipe
gdpr-subject-data-update(remove the “user” filter to see the complete list of pipes). Check the output of this pipe and you should see all the entities from all four datasets. These entities will eventually go into data subject as per his or her data access request.That’s it! We can now make a request as a data subject using our GDPR portal for the related data stored with the company.